Blackarch Linux Penetration Testing 2020 01 01 Complete Install

BlackArch Linux is an Arch Linux-based penetration testing distribution for penetration testers and security researchers. The repository contains 2521 tools. In this article, I’m going to show you how to install BlackArch. A Step-by-Step walkthrough..!
To be honest, I am completely surprised by what I see now, great progress from BlackArch. How fast it is. Last year was the last time I had BlackArch on a computer. Now tested for a few days, for this article and video. Very surprising ..! I can really recommend everyone to try BlackArch.
Download BlackArch
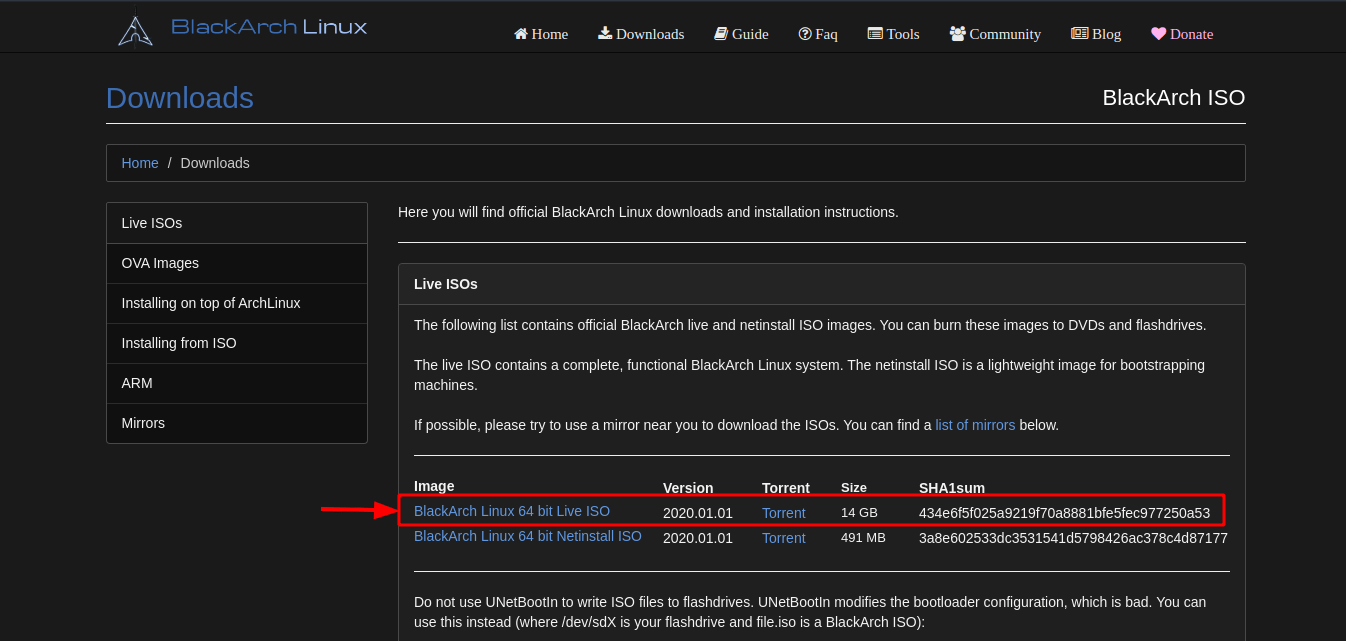
On the official download page, there are various download options. Personally, I always prefer to download the ISO from the official website. So you can be sure that you are not downloading some malicious files.
Do not use UNetBootIn to write ISO files
Do not use UNetBootIn to write ISO files to flash drives. UNetBootIn modifies the bootloader configuration, which is bad. You can use this instead (where /dev/sdX is your flash drive and /path/to/file.iso is a BlackArch ISO)
I would like to make a further comment: This applies to all Linux distributions. The best is to write you ISO file as below.
Install the ISO to USB Linux command line
Put your USB stick in your computer and give the command “fdisk -l” to “List the partition tables for the specified devices and then exit”
|
|
Make sure the USB is unmouted:
|
|
Use the command below to write your ISO to your USB
|
|
|
|

In the video that comes with this article, I am going to show you how to install BlackArch A Step-by-step walkthrough I also show you how to do the setup on VirtualBox, and how to use pacman, I show you how to play with the screen resolutions, and install a file manager.
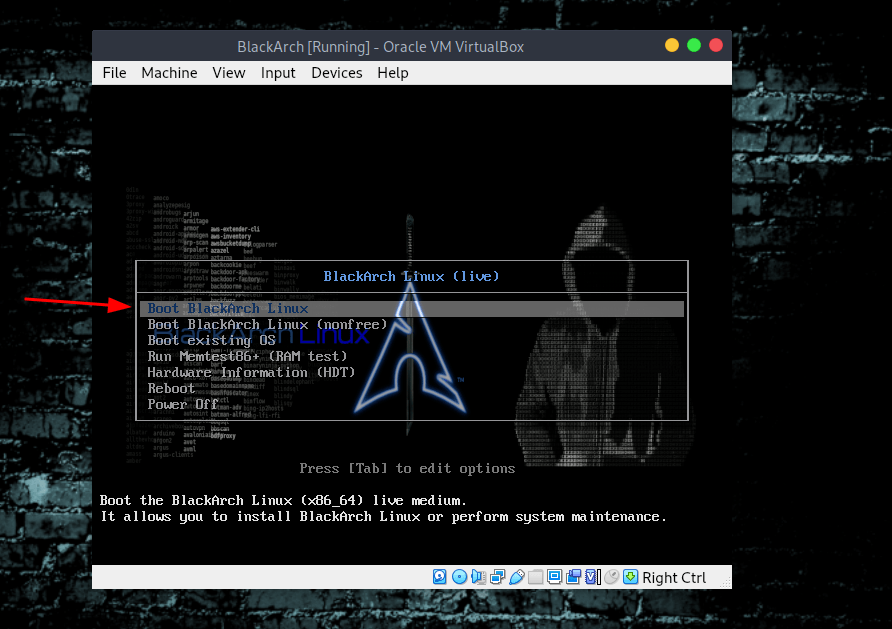
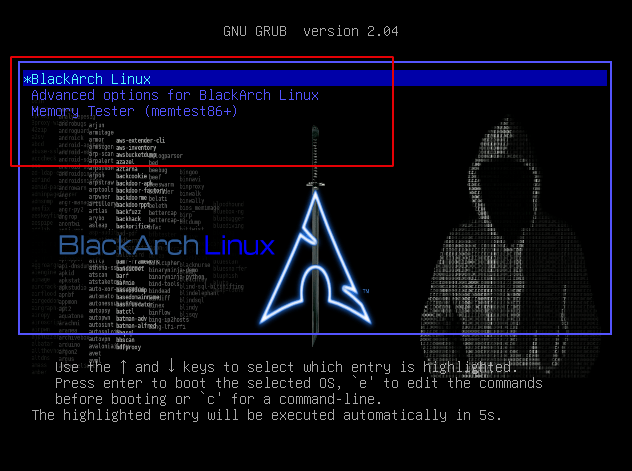
Boot BlackArch
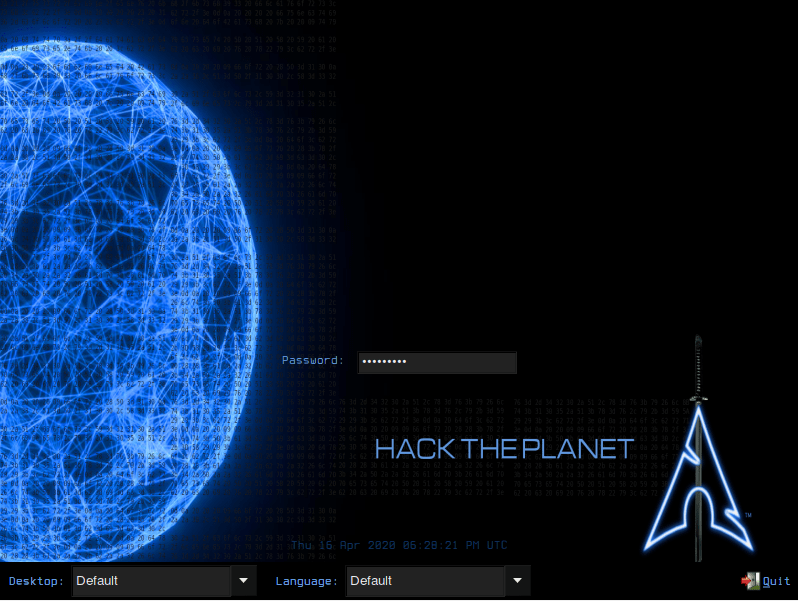
BlackArch Default Login
The default BlackArch Linux credentials are: (Also for all ISOs and OVA)
Login :: root
Password :: blackarch
Open the Terminal
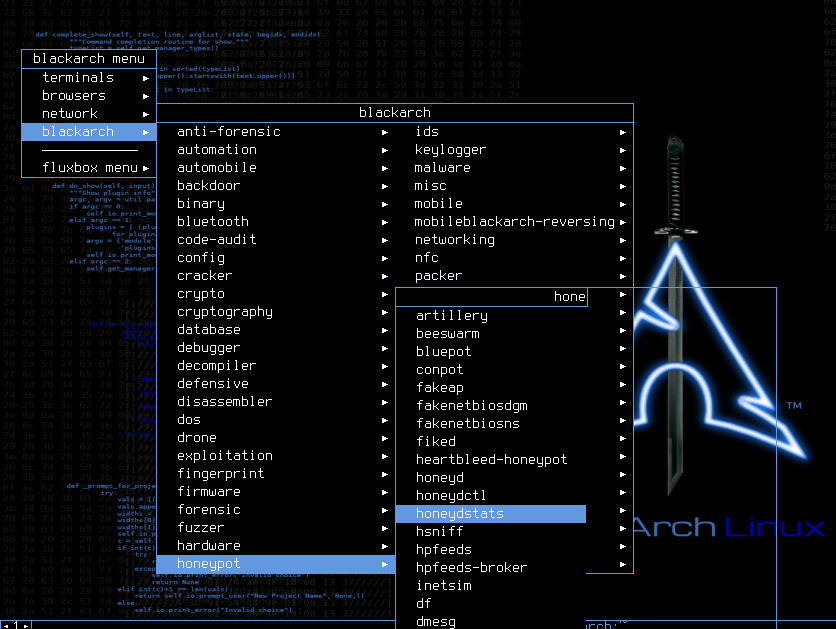
The way you execute the menu is right on the desktop anywhere. You can open op some terminals, browsers like Firefox and Chromium, the network settings. The BlackArch menu. At the moment BlackArch has 2521 tools but this changes every time.
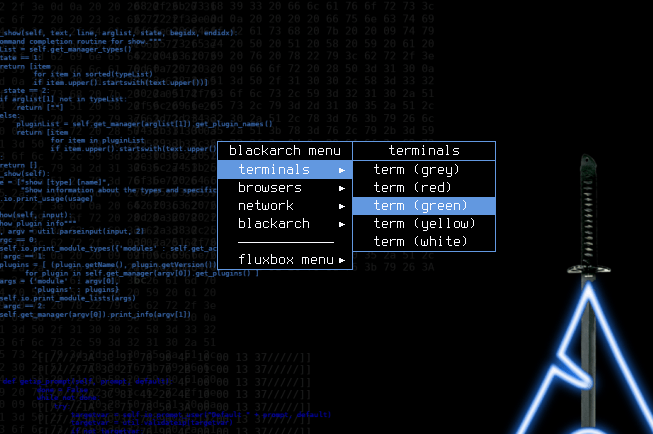
BlackArch Menu
Making the screen bigger in VirtualBox BlackArch
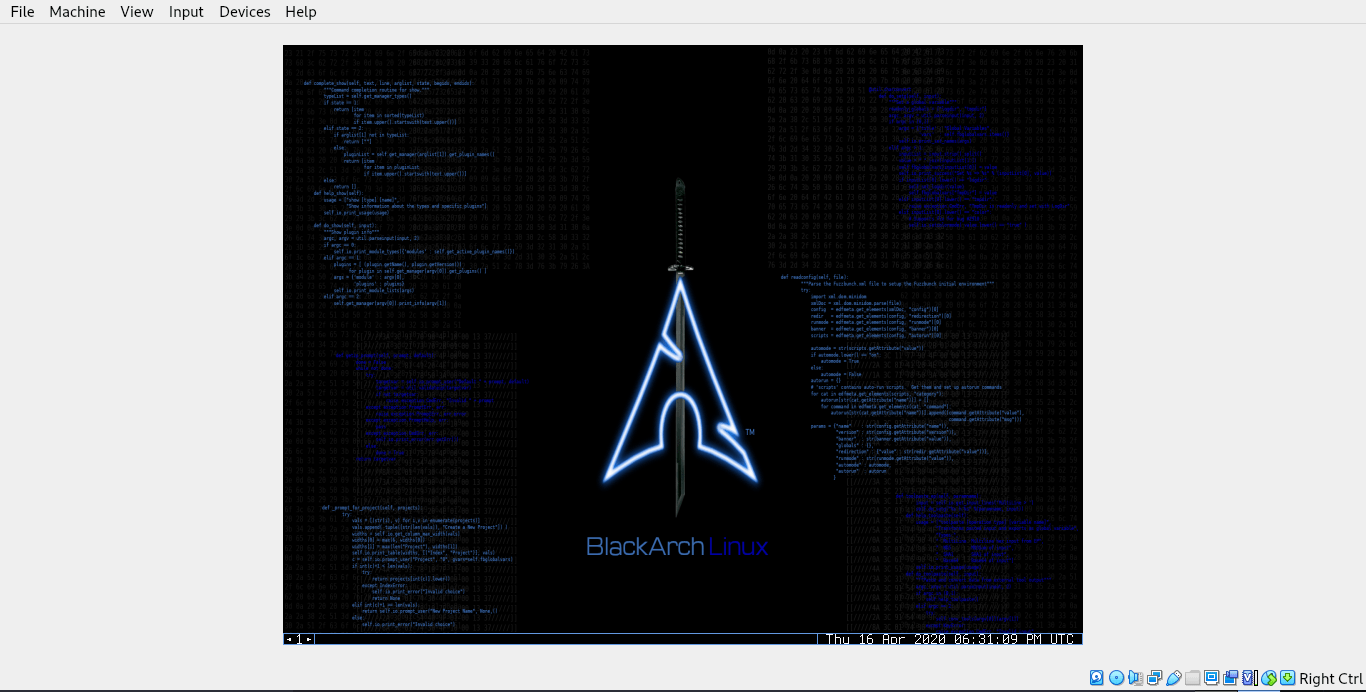
Since I show this installation from a VirtualBox, I like to have a normal screen. (It must be easy to work with).
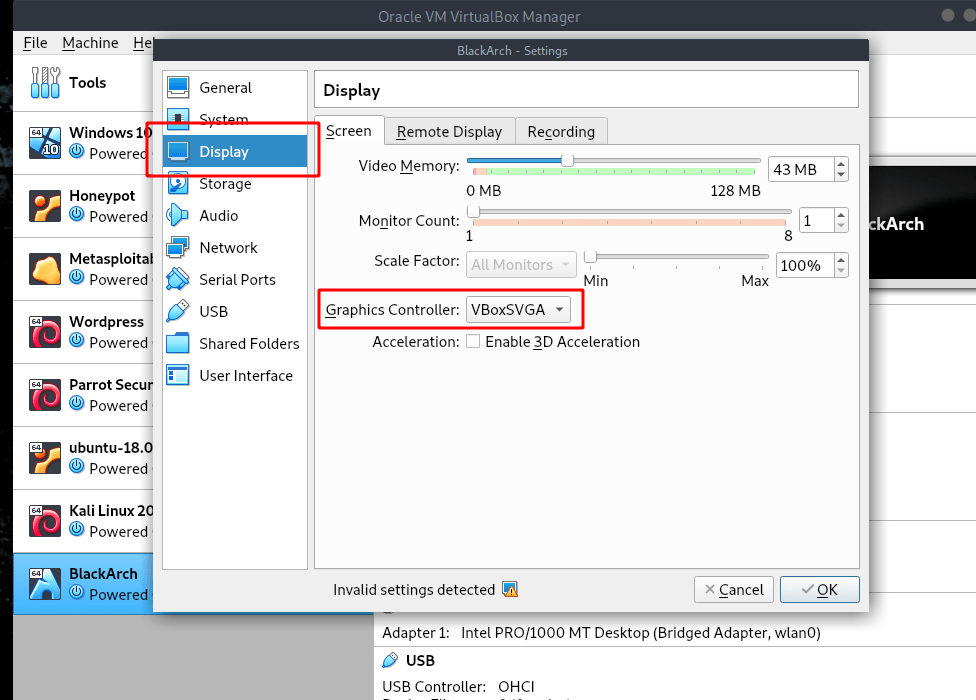
There are two options to make your screen bigger. I show them both. The first is the easiest, for that, you go to the Settings of VirtualBox and –> Display choose the option VBoxSVGA. This ensures that you start right away with a normal screen.
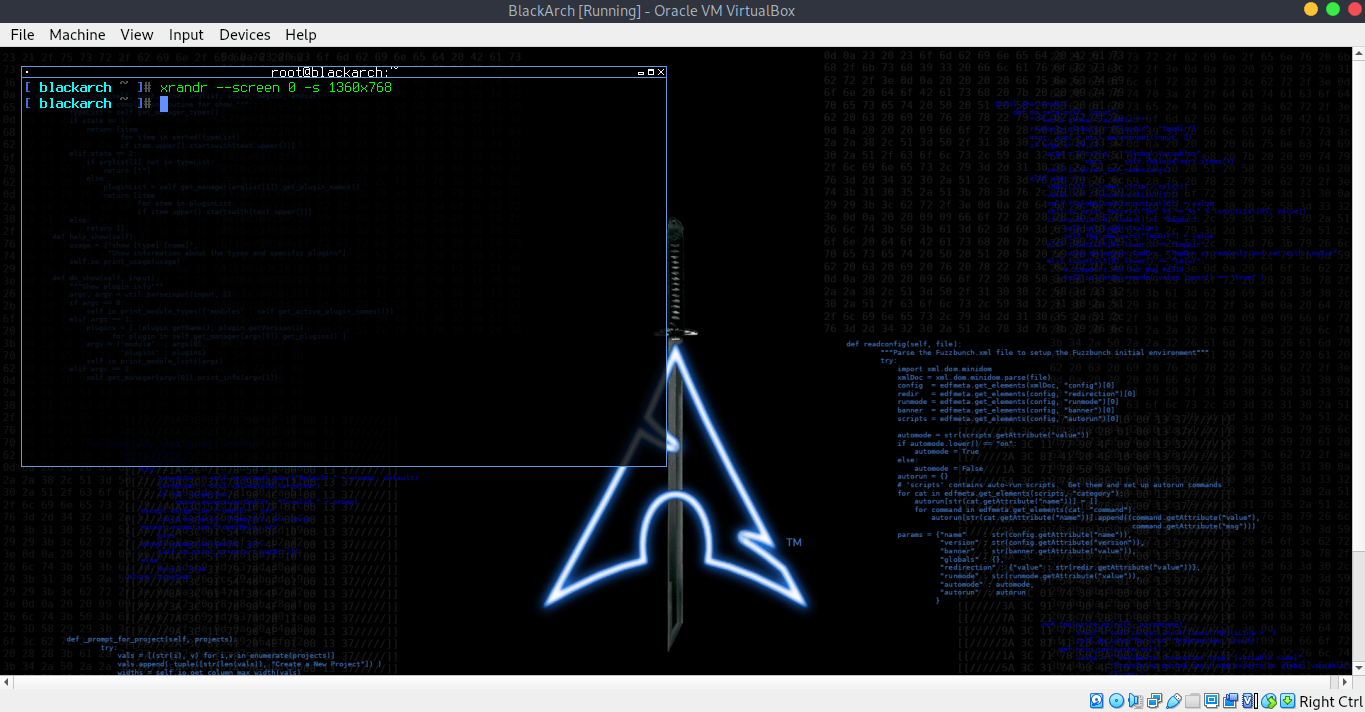
Still, I also want to show you the option in the terminal. This can be useful for many reasons. For this, I will adjust the screen size, with the following command(s)
|
|
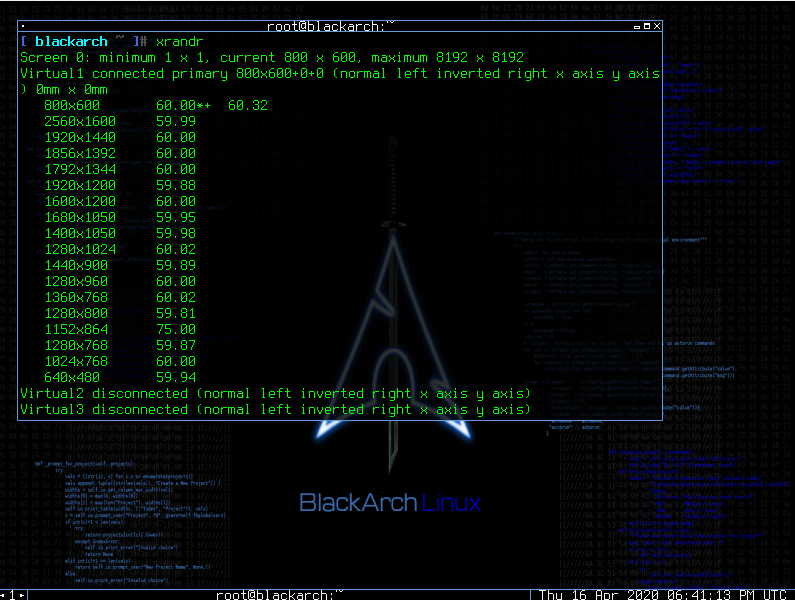
Virtualbox connected primary 800x600. The maximum will be 8192x8192
Choose the right screen resolution for your computer. And follow the next command. Choose the right one for your device.
|
|
Execute the BlackArch install script
To start the installation, you must execute the Blackarch install script. In order to avoid any problems that can cause you to restart the installation, make sure to have the internet available on the machine where you want to install Blackarch.
You can list the available network interfaces with the command ip a. If you want or only have wifi available as an option, you may read the arch wiki to know how to set up a wireless connection. (ie: wifi-menu/netctl) If your keyboard differs from the default one, qwerty us, you can set the keymap corresponding to your language/country. For example, enter the command loadkeys following the 2 letters of your country code.
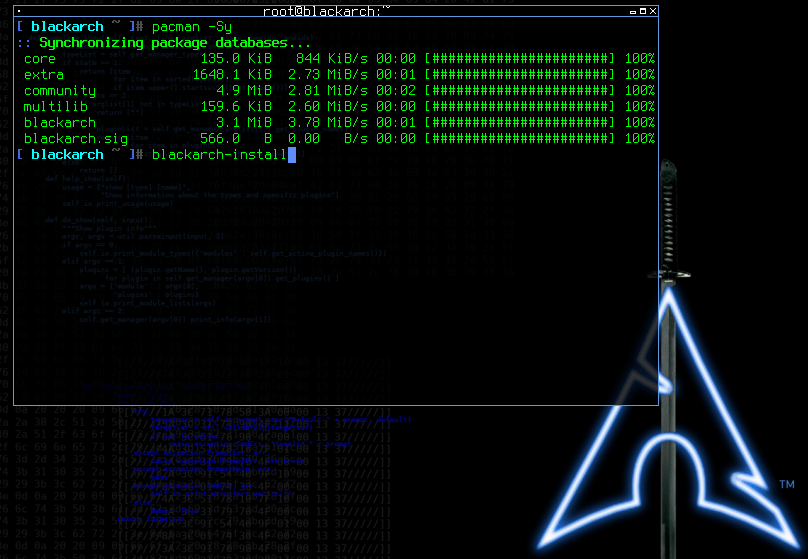
Execute the command blackarch-install to start the Blackarch install script.
|
|
|
|
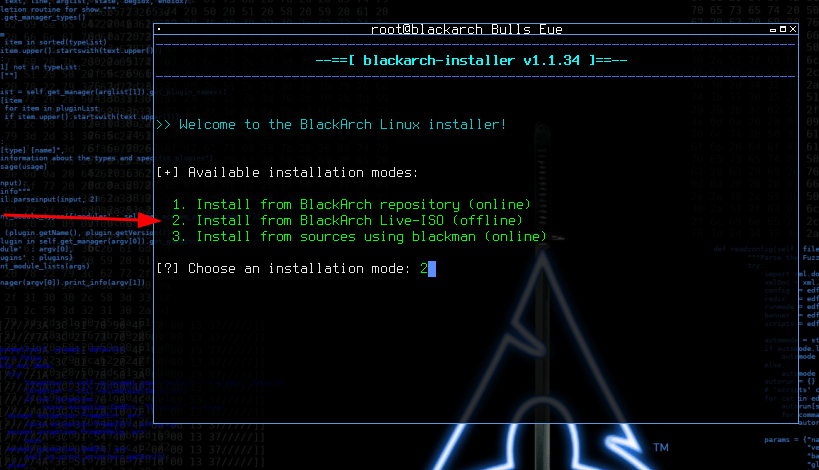
Available installation modes
3 options should now be displayed
1. Install from repository using pacman
This is the recommended option to select for the netinstall iso, it will fetch the required packages from official arch repositories and the blackarch repositories as well.
2. Install from Live-ISO
If you downloaded the live ISO. If you choose this option you will not need internet during the install process. However, in order to have an updated system, after the installation has finished, once you reach your install environment (after you boot into the fresh install) start a general update using pacman -Syyu .
3. Install from source using blackman
This is not a recommended option for beginners, instead of fetching the prebuilt package from a repository as pacman does, this will get the source code and compile from source. It’s similar to emerge available on a Gentoo system (blackman simply builds from source, emerge is infinitely more advanced and offers a ton of features)
Because we make this installation in VirtualBox and we have downloaded an ISO, we choose option 2
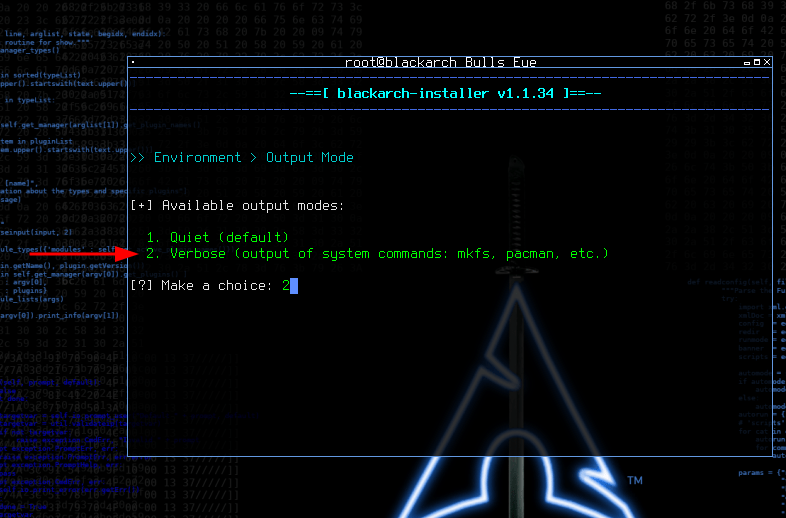
Available output modes
1 Quiet (default)
2 Verbose (output of system commands: mkfs, pacman, etc.)
I would like to see what happens, so I choose option 2
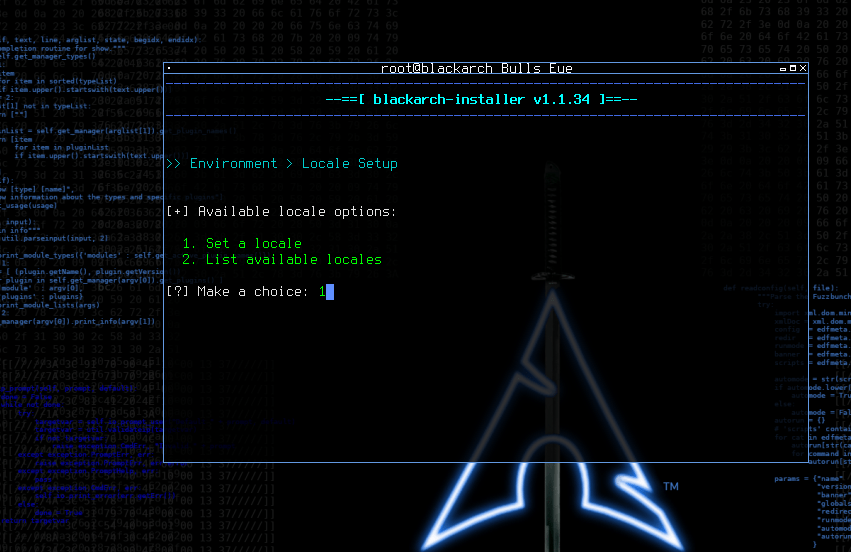
Available locale options
1 Set a locale
2 List available locales
I also go here for the default option 1. To see a list, select option 2
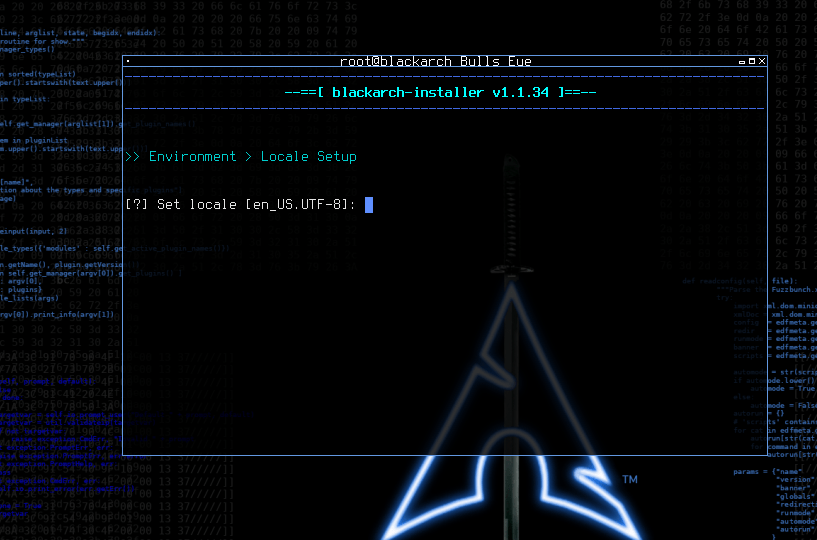
Set the locale and press enter, If you have the default option.
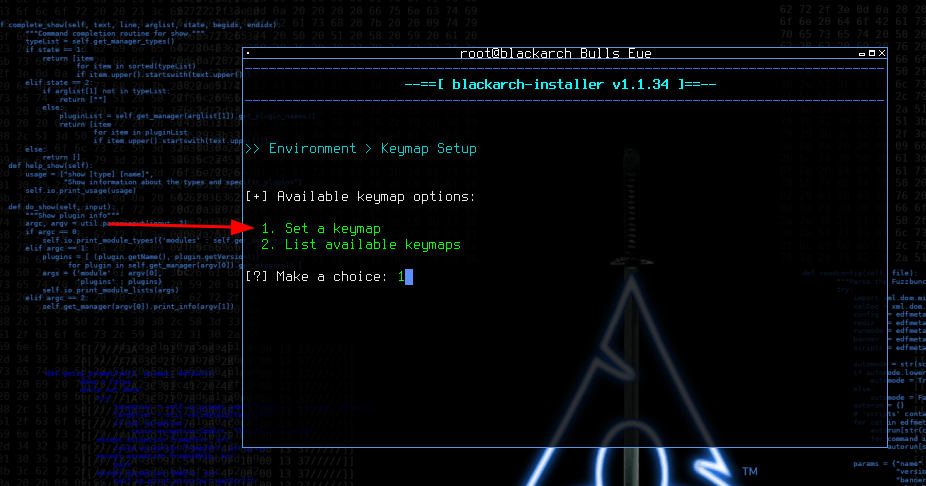
Available keymap options
You now have to select the keymap you want. If you have a qwerty based keyboard, you can stick with us keycode, however, this may not always be the case. If you are unsure, you may List available keymaps on Blackarch by selecting 2. Most of the time, the English country code is used. For a french azerty, the keymap will be fr, for Spanish es, etc… If you know the keymap, set 1
1 Set a keymap
2 List available keymaps
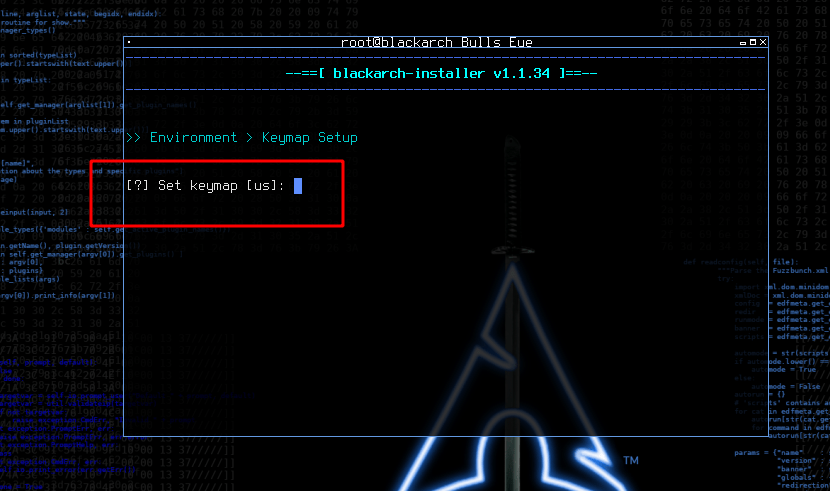
You have to write the keymap as explained above
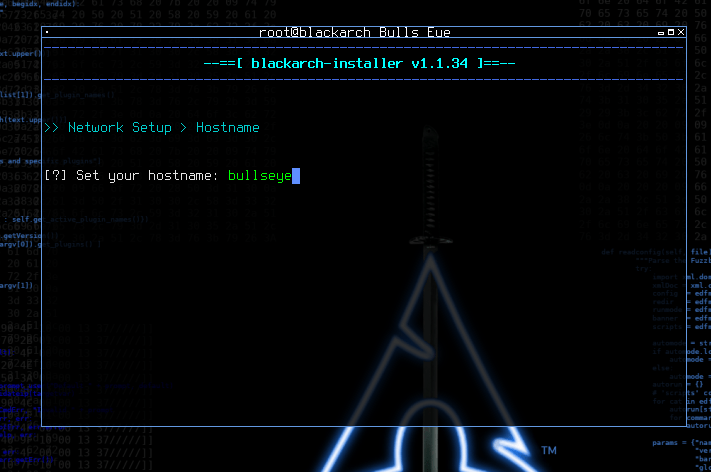
Network Setup BlackArch
[?] Set your hostname
The hostname is basically the name you want to give to your computer on your local network. It will resolve as the name given. You may choose whatever you like and this can be changed at any time by editing the /etc/hostname file.
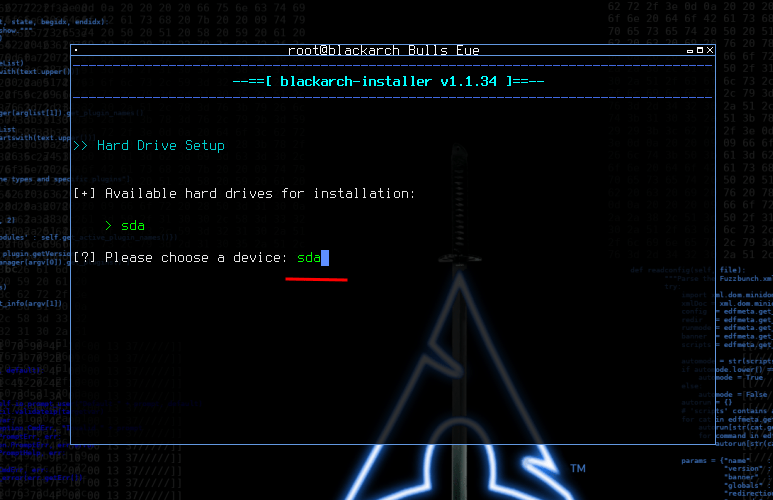
Hard Drive Setup
Available hard drives for installation
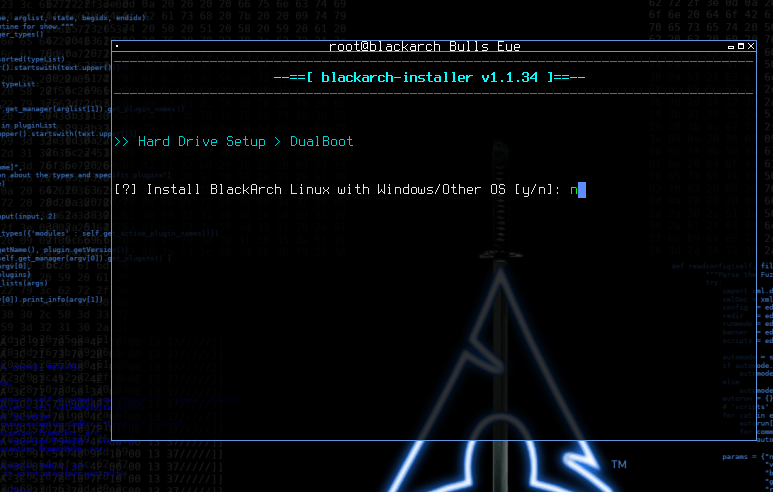
Hard Drive Setup > DualBoot
This is a great option if you would like to have a DualBoot on your device. Since this installation is a VirtualBox, I choose n
Install BlackArch Linux with Windows/Other OS [y/n]
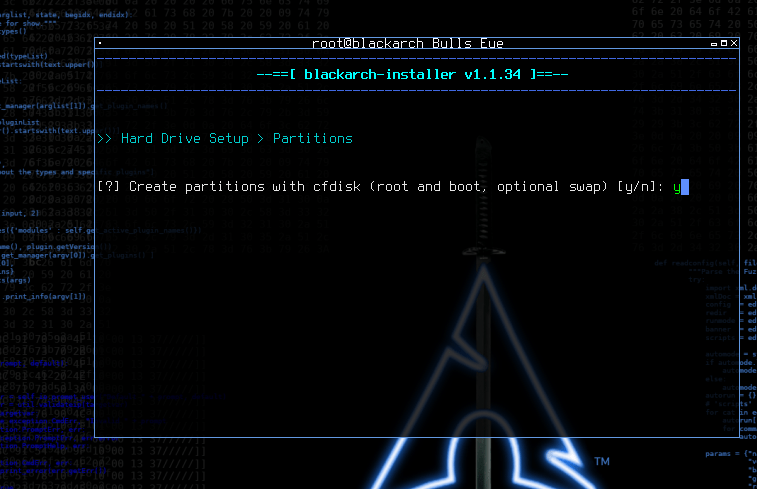
Hard Drive Setup > Partitions BlackArch
There is only just one option to go ..!
Select y when the script asks you if you want to create your partition with cfdisk, selecting n will stop the install of BlackArch.
Create partitions with cfdisk (root and boot, optional swap) [y/n] y
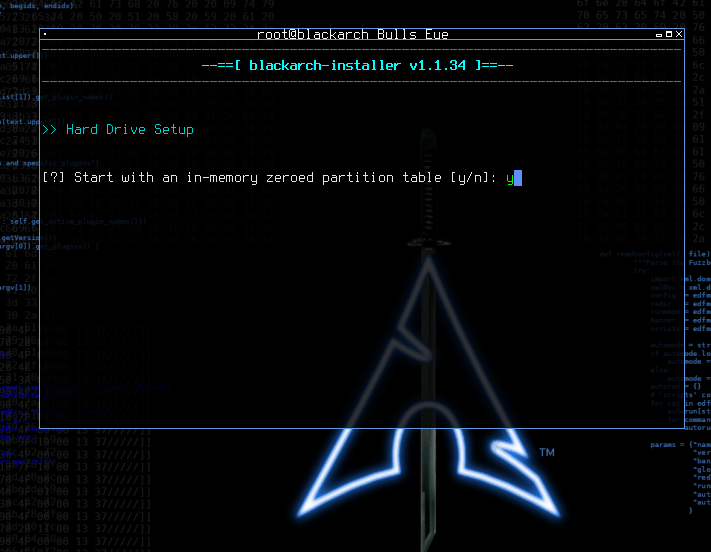
Hard Drive Setup
Start with an in-memory zeroed partition talble [y/n] y
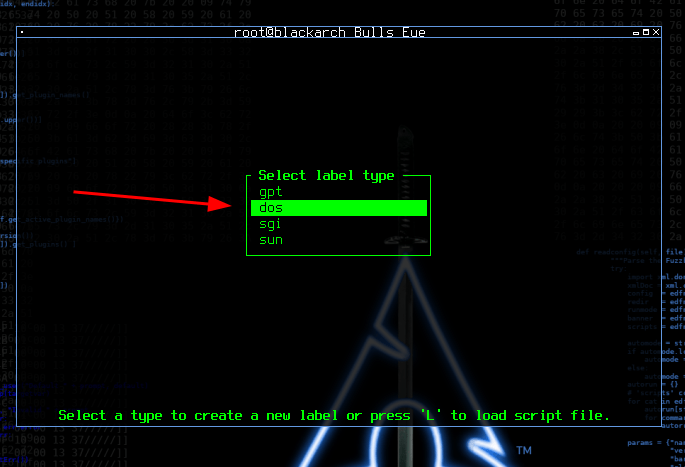
Select label type
If your storage device already has a label type, you won’t see this, otherwise, set it to dos.
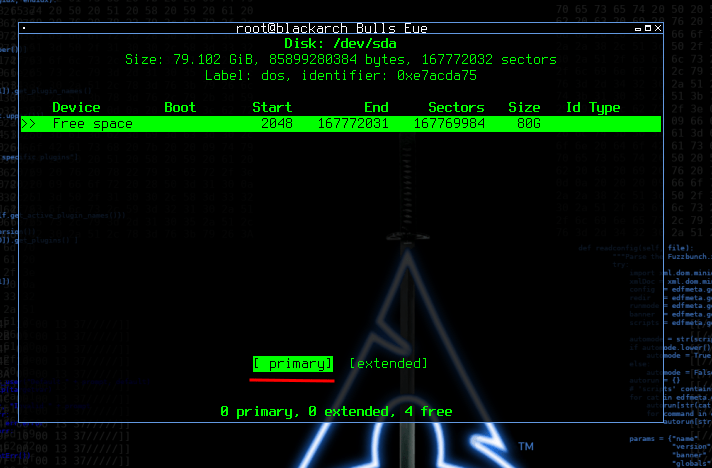
Setup the partitions BlackArch
You now have to setup the partitions. The example given is a basic one and should work in most cases. You will need to create at least 2 partitions (boot and root) but we will use 3 in this example including the swap partition. Let’s start with the first one, boot.
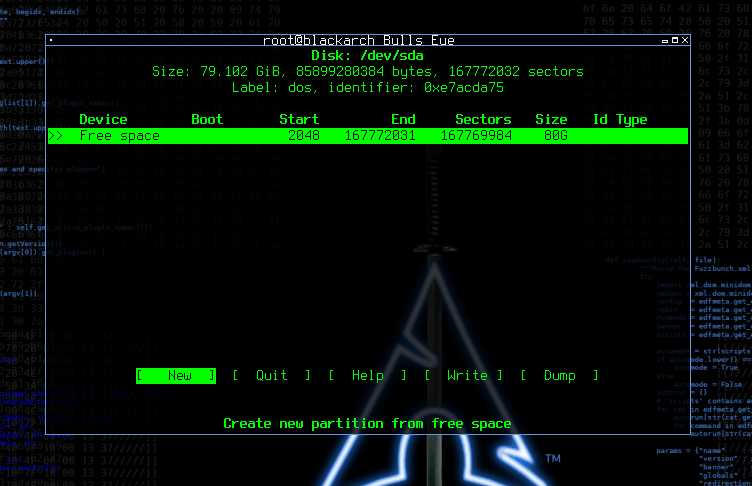
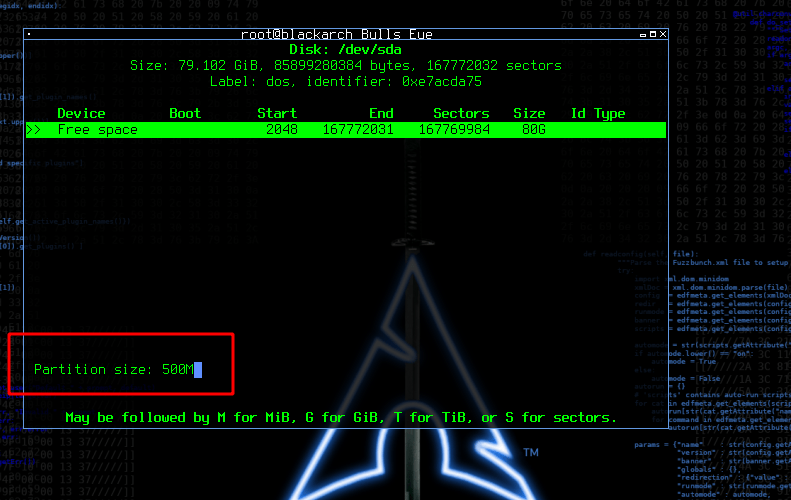
Using the arrow, go to New, push enter and write 500M, This is enough space for most users since you won’t have more than 3 different kernels at the same time.
Select primary and press enter.
You need to mark this partition as bootable. Go to the option bootable and press enter. The * should appear as on the screen.
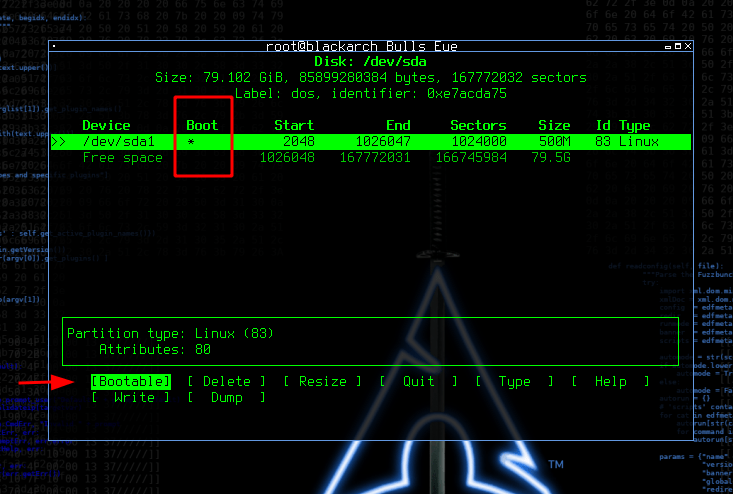
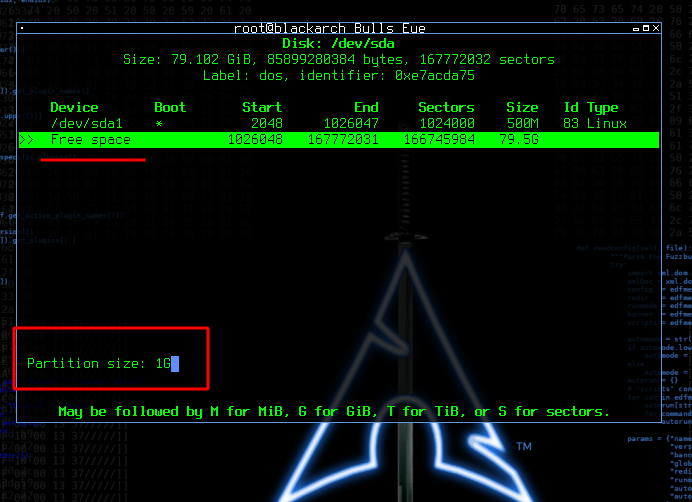
Afterward, go to the second partition, press the down arrow to select the free space then select New.
This will be our swap partition. Press enter and write 1G. Press enter again and select primary.
For this partition, you need a different type. Using the arrow, go to Type and press enter.
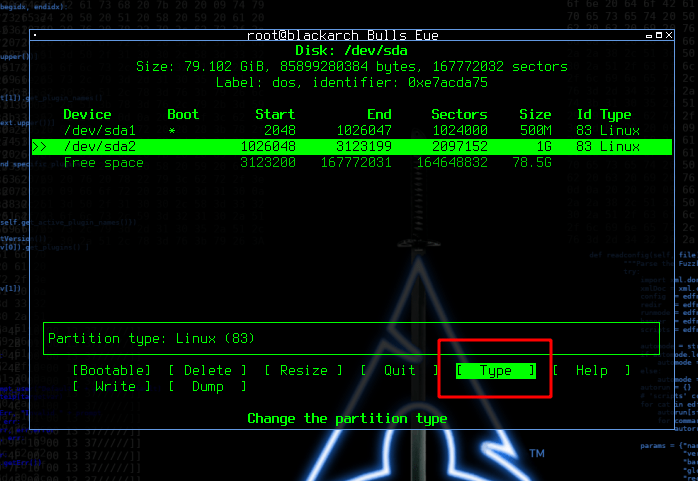
A list will be displayed.
Select Linux swap /solaris [82] and press enter. Let’s go for the last partition.
![Select Linux swap /solaris [82] BlackArch](/wp-content/uploads/2020/04/Select-Linux-swap-solaris-82-blackarch.png)
The same process, as we did earlier, select the free space in green, go to New and press enter. This time you don’t need to write anything. We want to take all the free space available. Simply press enter twice.
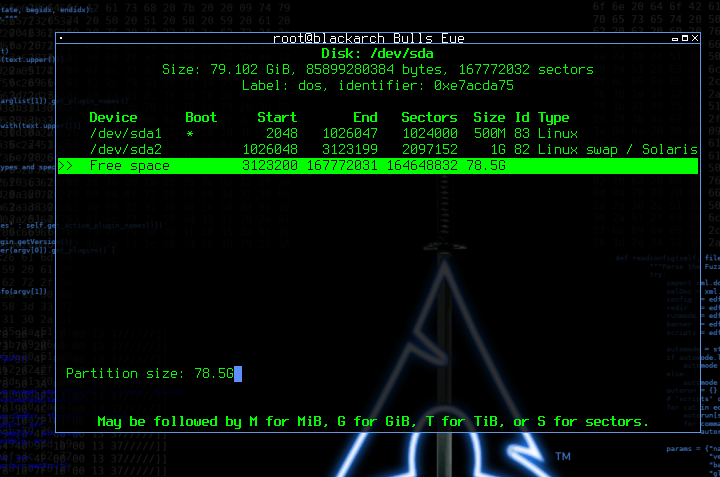
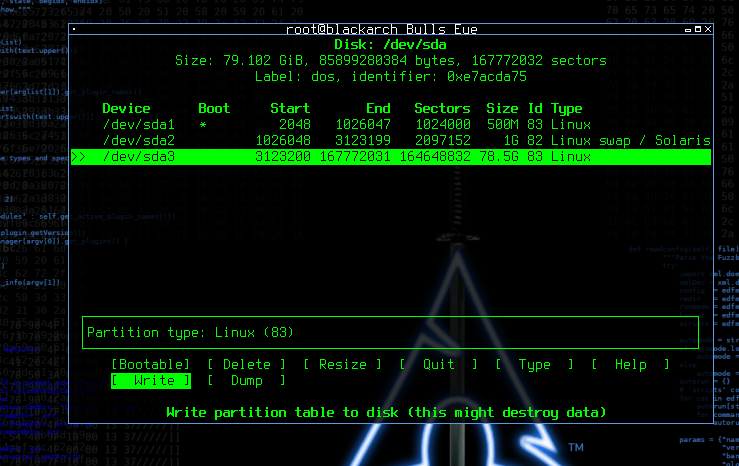
Before you quit cfdisk you must save this partition table. Go to Write and press enter.
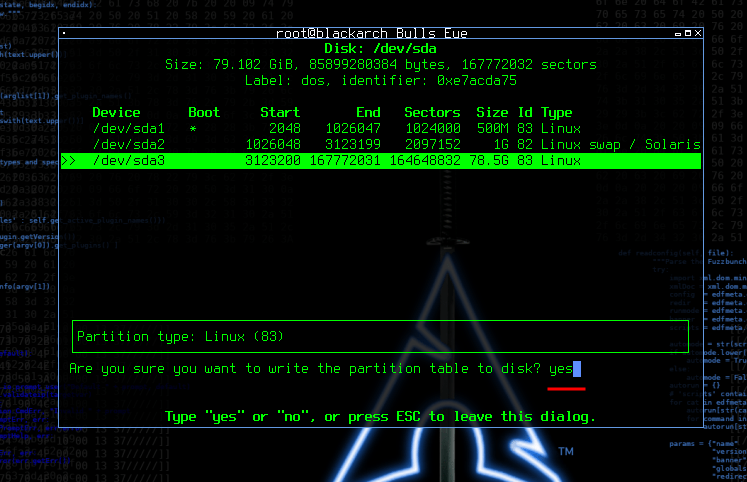
It will ask you to confirm your changes. Write yes and press enter and you may now quit.
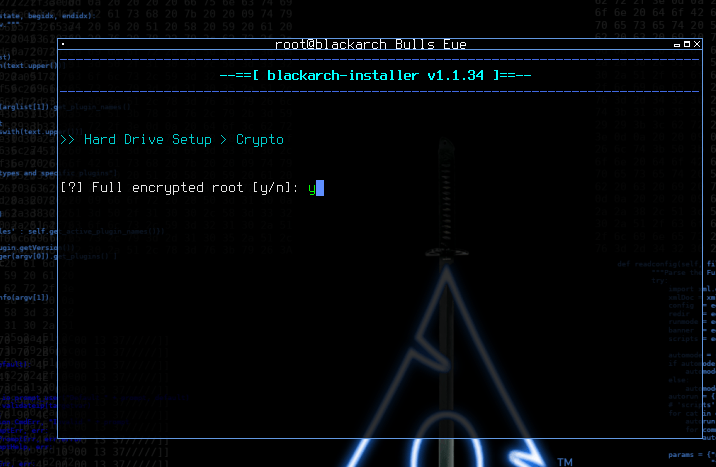
Hard Drive Setup > Crypto
You have the choice to fully encrypt your root partition with LUKS. It’s recommended to set y as your data may be sensitive and you want to keep it private from anyone (in case your computer gets stolen or is taken by some agency…). Do not make something too easy as it can be brute-forced.
Be aware that if you forget the password to unlock your LUKS partition, the data nor the password can be recovered.
If you have an SSD, if you encrypt the data with LUKS it will drastically reduce the lifetime of the SSD. Encrypting the stored data requires a lot of disk writing (uncrypt as well), you can fix this problem by adding root_trim=yes as an option in your bootloader.
For grub, look for the line of the currently used kernel, similar to the following :: linux /vmlinuz … root=/dev/mapper/ … root_trim=yes (add it at the end of the line)
Because this is an article example for me, I think it’s fine for now, so mine option is n
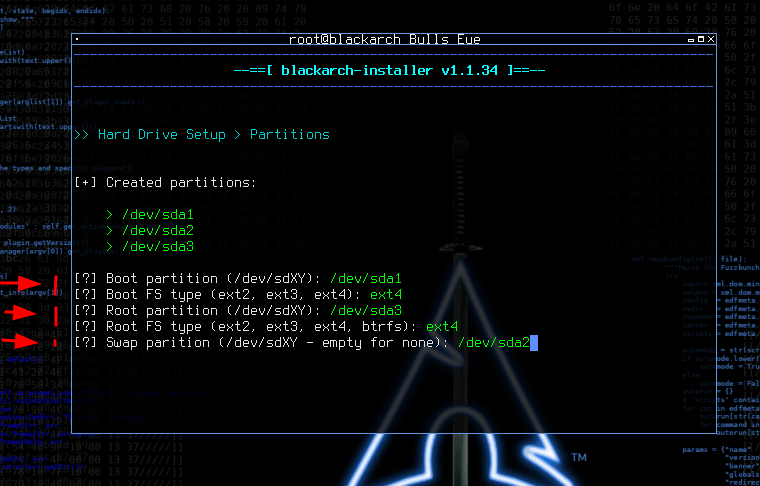
The filesystem for each of those partitions must be defined. Ext4 is the default choice since it’s the most recent.
First, boot will be /dev/sda1 and choose ext4 for the filesystem.
The second partition will be the root, write /dev/sda3 and choose ext4 as a filesystem.
The last one will be the swap, write /dev/sda2 or just push enter if you haven’t created one.
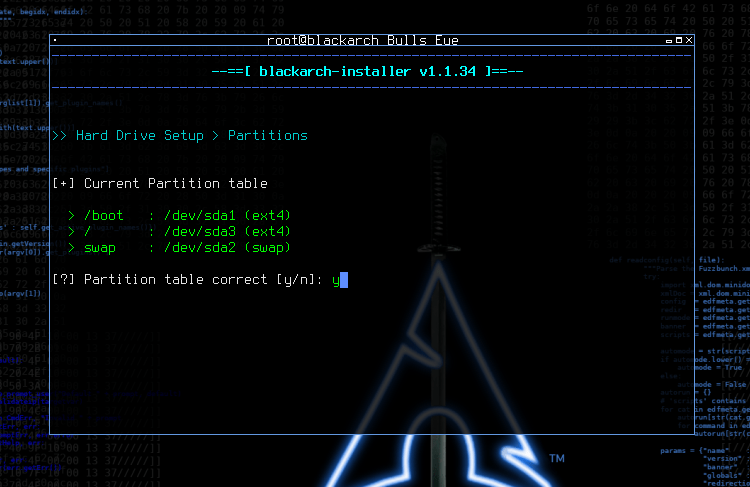
Make a mistake, and there is no turning back. You can start again. So pay attention.
Partition table correct
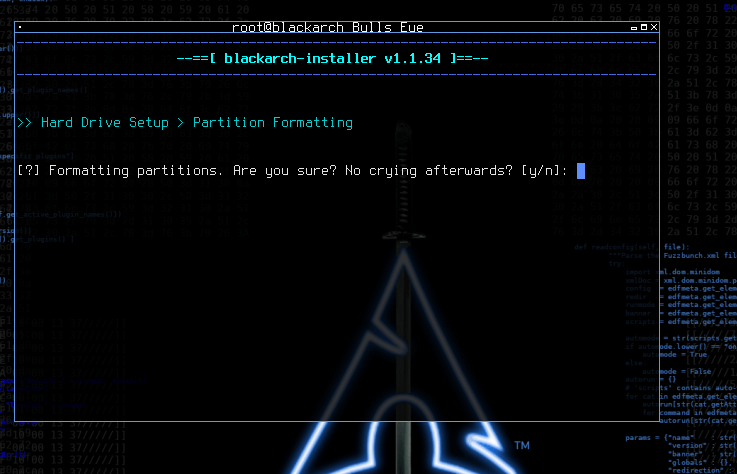
Are you sure? No crying afterwards? :-D
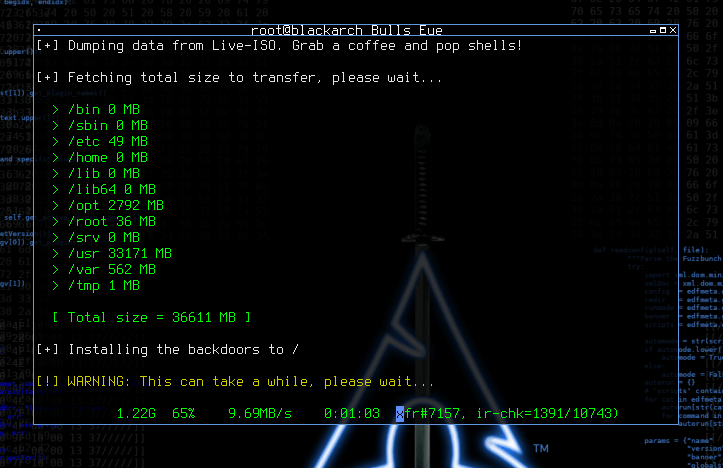
Dumping data from live ISO
Now the script will download the latest necessary packages for your system. This will take a little time depending on your internet speed.
Grab yourself a coffee and pop shells..!
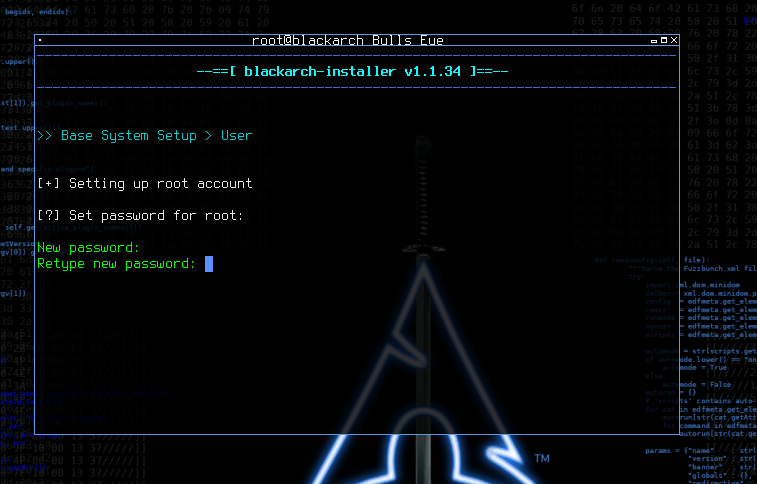
Password root
When the install is finished with this task, you will be asked to set the password of your root account.
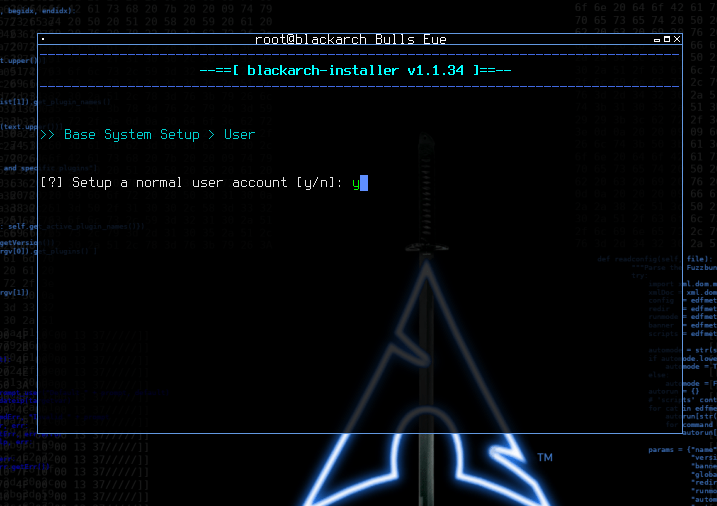
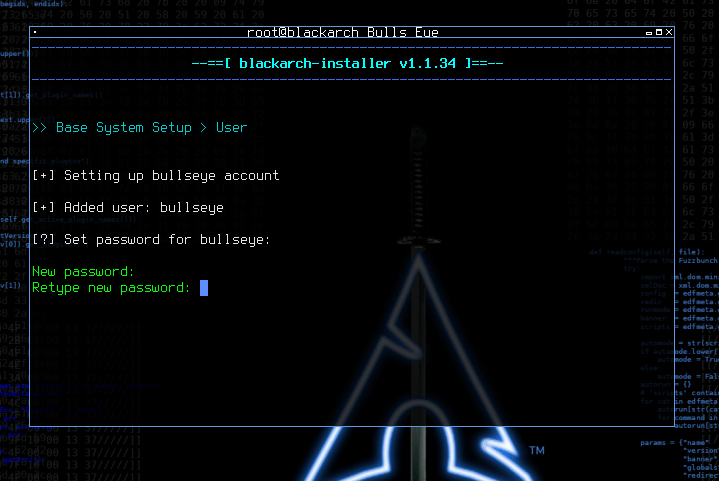
Next, you need to create a normal account, using the root as the only user of your system is wrong and you should never do it.
Timezone
Now the script is ask you for the timezone. The default is UTC.
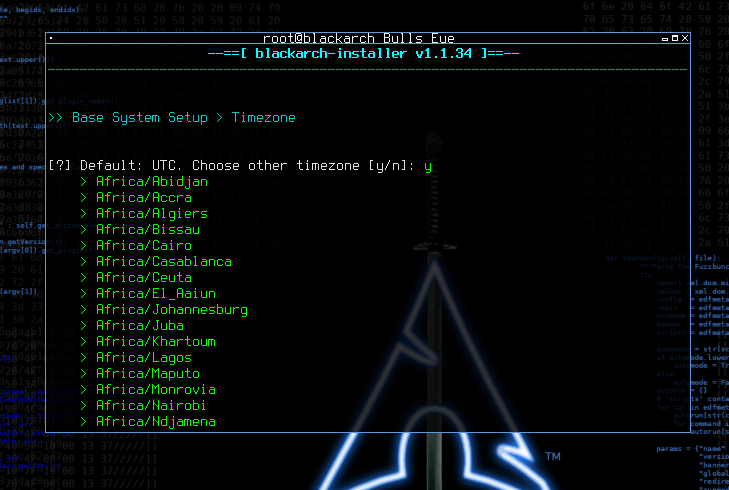
For this install I choose the default UTC. You can always change this afterwards

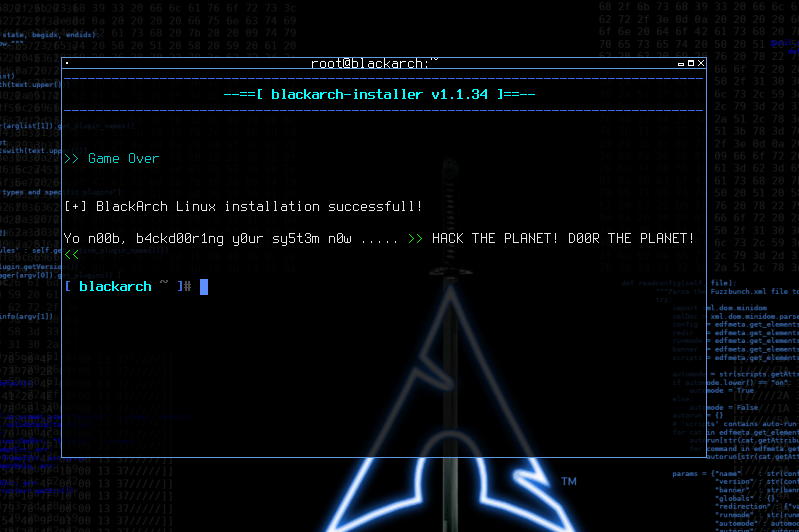
Came Over BlackArch
If you ever wonder what the meaning of that is. It’s just a “Joke” made by a developer. In other words, this means that its the end of the installation.
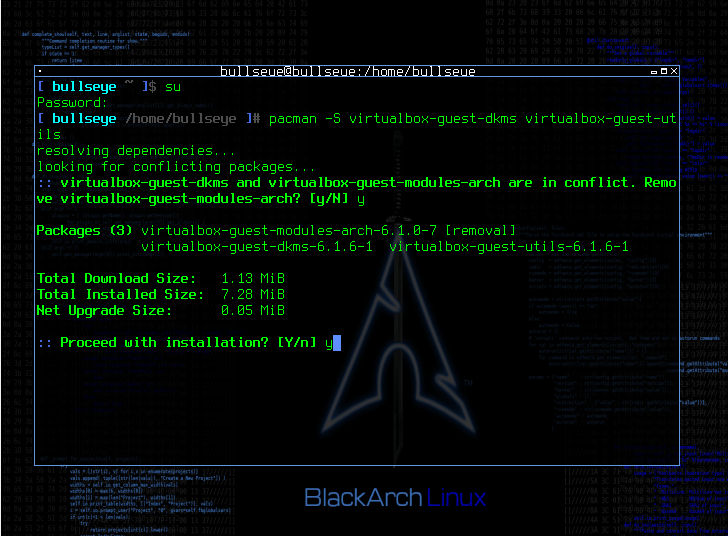
VirtualBox Guest Additions BlackArch
This extension enables seamless mouse movement, share clipboards or files between the host OS and the guest and configure screen resolution dynamically.
- Mouse pointer integration
- Shared folders
- Better video support
- Seamless windows
- Generic host/guest communication channels
- Time synchronization
- Shared clipboard
- Automated logins (credentials passing)
Install the VirtualBox guest utils
|
|
|
|
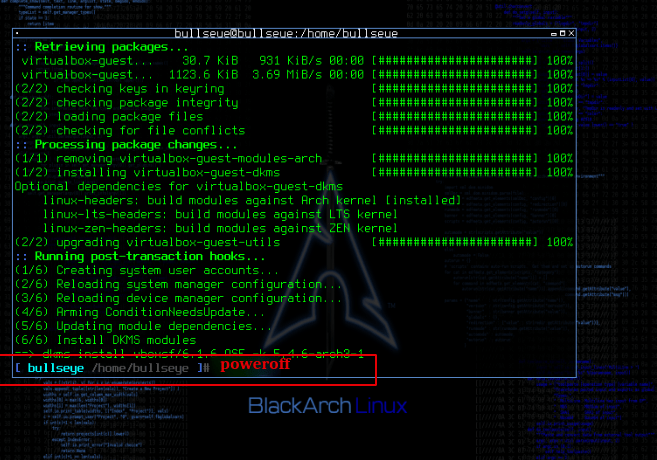
After the VirtualBox guest utils are installed. You have to shut down because you have to remove the image before you can go further.
|
|
BlackArch Remove Disk from Virtual Drive
This is because else BlackArch will not boot automatically.
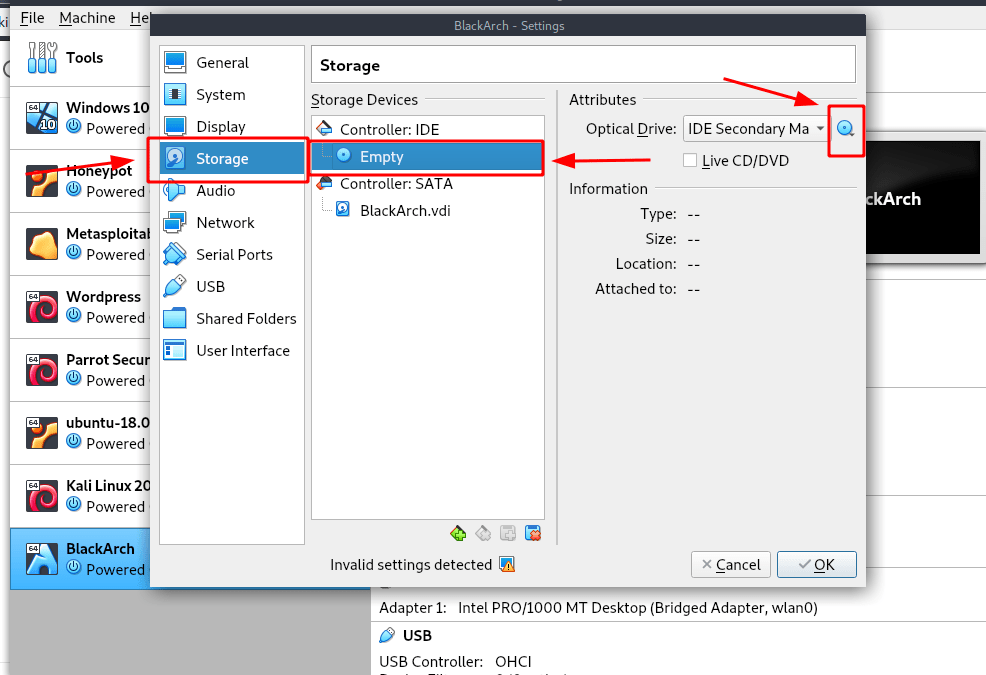
Nou that we remove the disk from the Virtual Drive , we can boot up BlackArch.
Enjoy Blackarch Linux, and remember the developers/contributors of BlackArch Linux are volunteers. All the work provided is free and was done in their free time.
Video BlackArch
In this video, I show you a complete installation of BlackArch. A Step-by-Step walkthrough ..! I also show you how to do the setup on VirtualBox, and how to use pacman, I show you how to play with the screen resolutions, and install a file manager. I hope you going to enjoy this video ..!
If you like the video, don’t forget to subscribe to my channel.
BlackArch Linux Penetration Testing 2020 01 01 Complete install
BlackArch Linux 2020.12.01 Complete Install & What to Do After Installing BlackArch
Become a member on Odysee.com
Earning on Odysee for watching videos ♥️
Here an invitation link, so that we both benefit.
In this way, you also support my work.
https://odysee.com/$/invite/@hackingpassion:9
WANT TO SUPPORT THE WEBSITE
Dear people, I do a lot of things on the Internet and I do it all for free. If I don’t get enough to support myself, it becomes very difficult to maintain my web presence, which takes a lot of time, and the server costs also have to be paid. Your support is greatly appreciated.
Thanks guys ..!
https://paypal.me/hackingpassion
Use the link above to donate via PayPal.
IMPORTANT THINGS TO REMEMBER
✓ This Video and Article is made for educational purposes and pentest only.
* You will not misuse the information to gain unauthorized access.
✓ This information shall only be used to expand knowledge and not for causing malicious or damaging attacks…!
Read also the Disclaimer
All the techniques provided in the tutorials on HackingPassion.com, are meant for educational purposes only.
If you are using any of those techniques for illegal purposes, HackingPassion.com can’t be held responsible for possible lawful consequences.
My goal is to educate people and increase awareness by exposing methods used by real black-hat hackers and show how to secure systems from these hackers.