Determine if Your Linux Computer or Server Is Hacked

Ethical Hacking Complete Course Zero to Expert
Hack like black hat hackers. Penetration testing, Kali Linux, WiFi and web hacking, and the hacker mindset behind it.
→ Take the full course“Advice from a Hacker” How do you determine whether your computer or server has been hacked. If you suspected this, this article certainly applies to you. But I also discuss several great commands that every Linux user or “Hacker” should know. And I show you various options. Some of these commands will also work for a Mac and Windows, so it’s a good idea to take a look if only for the tips you might want to use.
Keep calm and don’t panic if you have been hacked
If you have found something, do not delete anything or make any changes yet. Just classify everything. Do not access a file with cat or strings, catalog the files and save that for later. Once you start removing things, you can no longer investigate how deeply they have penetrated. Don’t be misled and just stay calm. Just do some investigation and research.
Take a good look at the attacker, you may find an IP address or a trace that has been left behind. This can only make the research more fun. Try to find out as much as possible about the attacker. If you have all the data then you can look to delete it safely.
Obviously, it is urgent if you are very duped and a lot of money is involved, but then hire a team of specialized Ethical Hackers or Cyber security Experts. If you have a business that is always the best you can do.
“What hackers do is figure out technology and experiment with it in ways many people never imagined. They also have a strong desire to share this information with others and to explain it to people whose only qualification may be the desire to learn.”
Show a listing of last logged in users
w or who
The first thing you should look for is who is currently logged into your computer. It is not uncommon to find the attacker actually logged into the server and working on it.
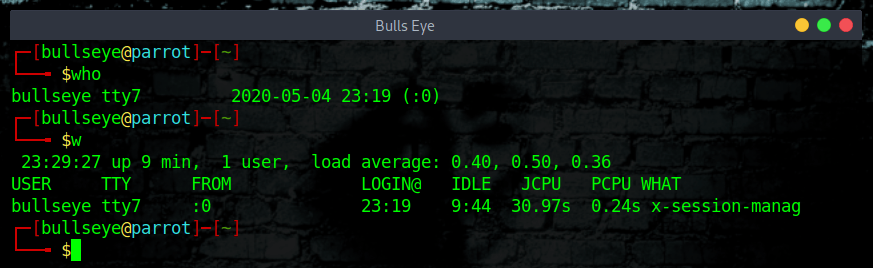
Use the command last
Show a listing of last logged in users. The history with this command goes all the way back to the start of the setup of the computer or server. (You can also immediately determine how long you have this Linux distro).
| |
| |
| |

Last command by a user
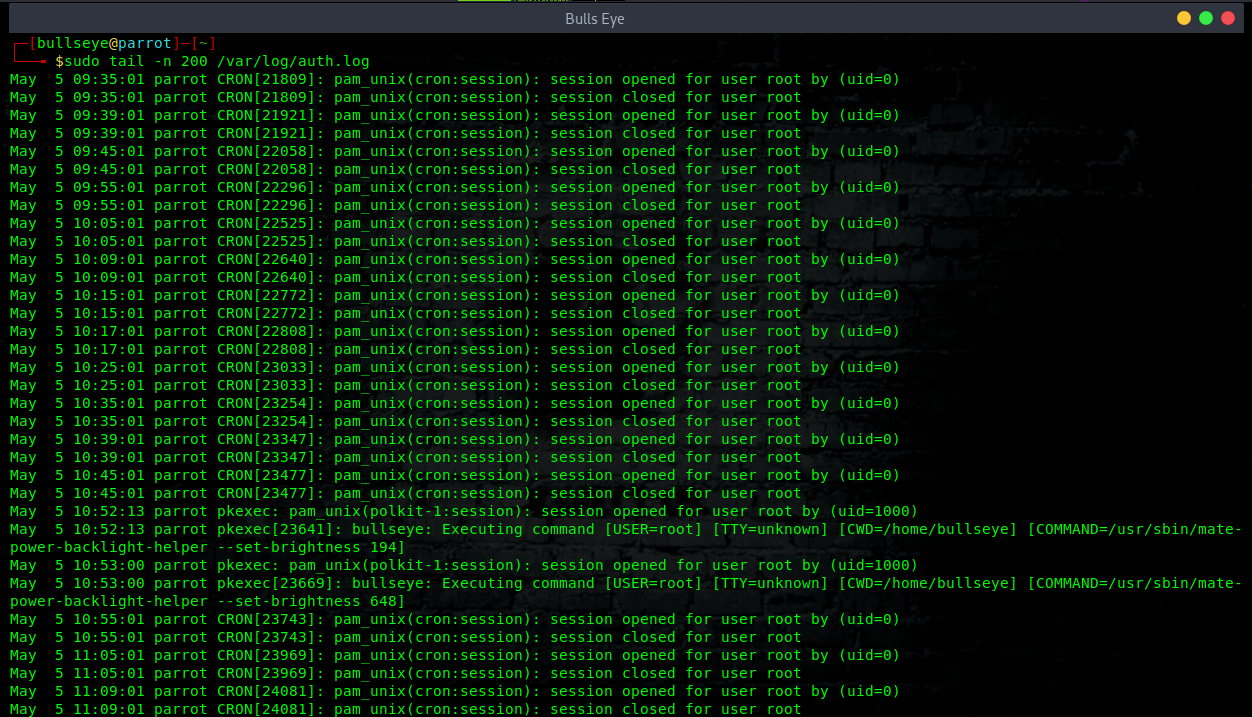
In case someone gets access to the computer or server “They” probably sent some command through SSH. The following command will show the last 200 lines of commands for the current user. The 200 I use in this example is just a number. You can use cat instead of tail to read all the logs.
| |
| |
Of course, you can also open an editor (Like vim or nano) and save the output. So that you can notice any changes at a later time. Check also command from other users that you might have on your computer. /home/username/
| |
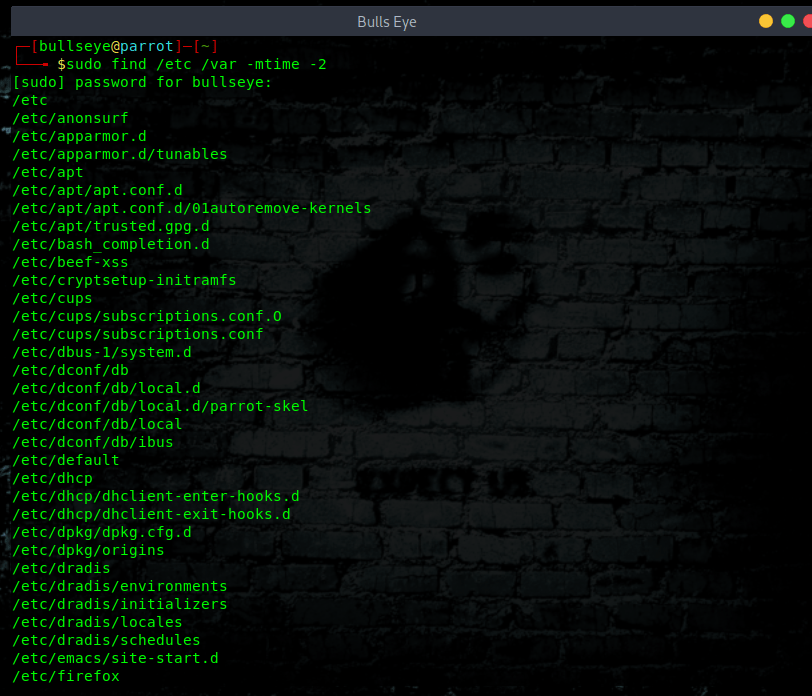
System files that have changed recently.
With this command, you can see what has happened recently. The “-2” means 2 days, i.e. this shows me all files modified in the last 2 days.
| |
Now if you haven’t installed any new software on your server for a while then this command will run and produce very little output. Here in this picture I just did a new upgrade, so there is a lot to see.
Verify the current connections from your computer and or server
Netstat
| |
| |
If you want more information about netstat, you can use the man (manual) page
| |
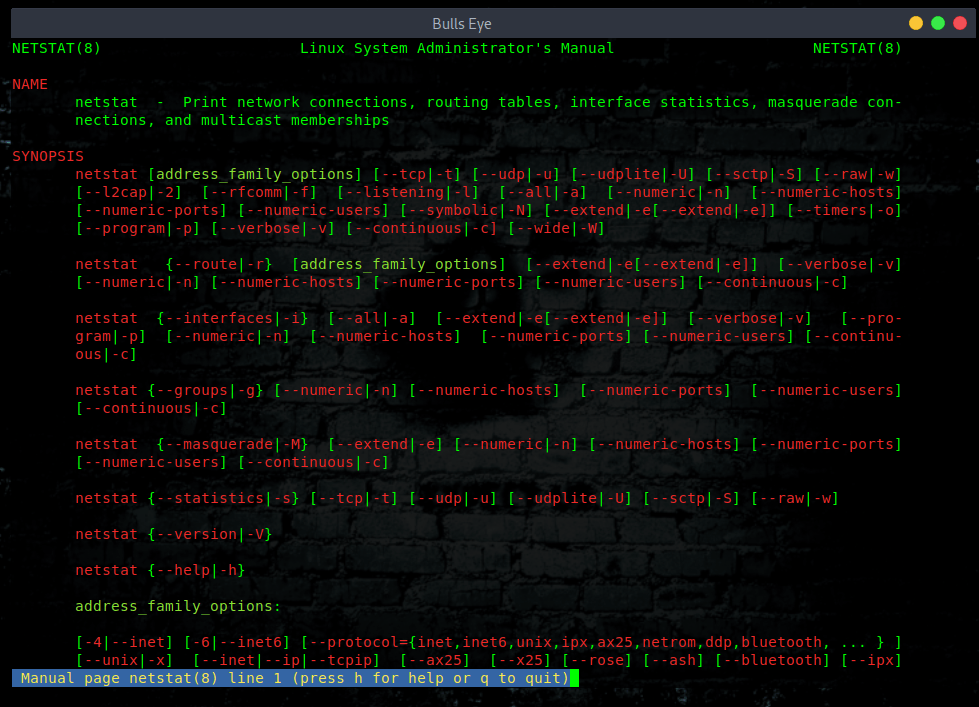
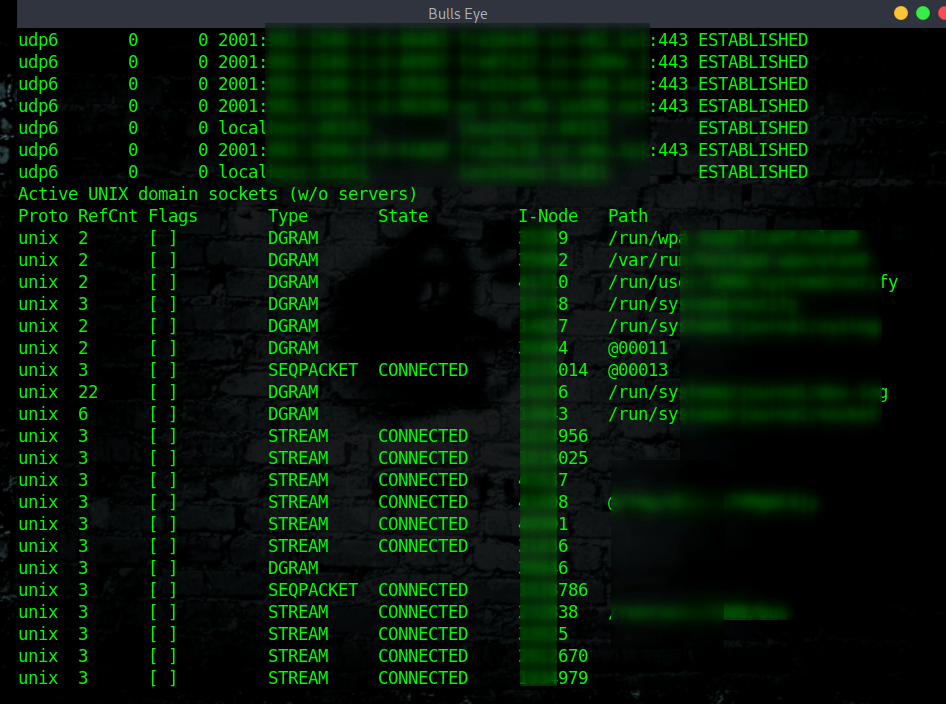
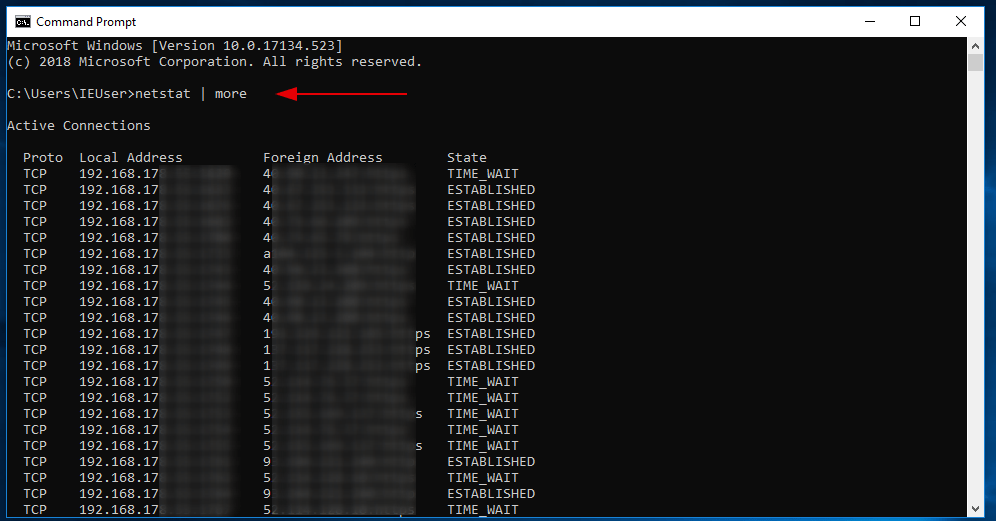
Often an attacker will install a program that doesn’t do anything except listen on the network port for instructions. You should look for any process that is listed as in the LISTEN or ESTABLISHED status as these processes are either waiting for a connection (LISTEN) or have a connection open (ESTABLISHED). If you don’t recognize these processes use “strace” or “lsof” (below an example) to try to see what they are doing.
This command will show you 2 parts, the first is “Active Internet connections (w/o servers)" and the second is “Active UNIX domain sockets (w/o servers)”
Check both carefully because if you got a malicious script running somewhere and this script is trying to sending spam mail or try to attach other servers you can easily find here.
| |
Also on Windows is Netstat to use. Open your Command Prompt and type:
| |
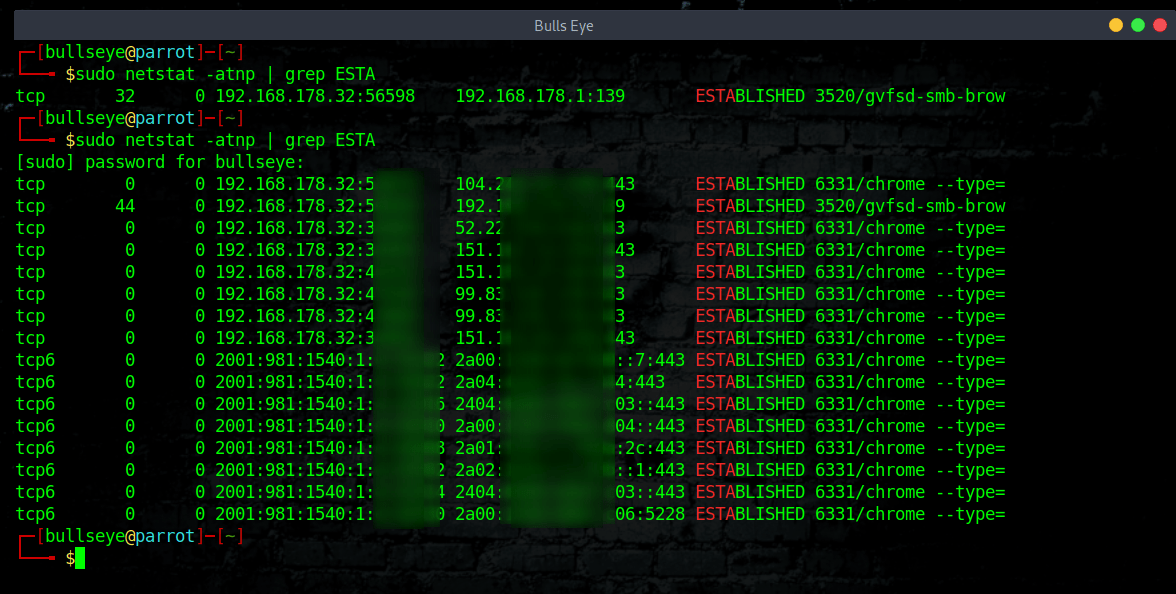
Below I show an example of how to use the command sudo netstat -atnp | grep ESTA used. The first image without having anything open, the second image when I opened about 15 tabs in Chrome.
I must say that these commands have always been useful in the past, for example when you spoke to someone on Telegram, you could see the IP addresses of the people you spoke to. (also from bots). This IP address leak is now closed.
| |
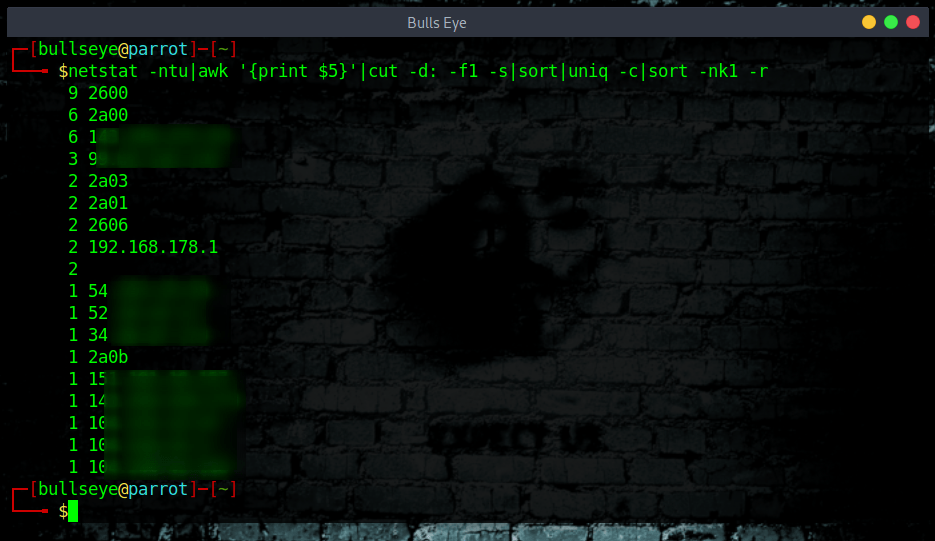
When entered correctly, this command will return a descending list of which IPs are connected to your (server) “I use this command often for my computer” and how many connections each one has. Looking at your results, you will see connections listed ranging anywhere from 1 to about 50 connections per IP. This can be quite common for normal traffic (server). If however, you see some IPs with 100+ connections, this is something to scrutinize.
Included in the list, you may see known IPs, one or more of the server’s own IPs, or even your own personal IP with many connections.
| |
lsof
The command lsof will list all networked processes. With the following options I use them:
| |

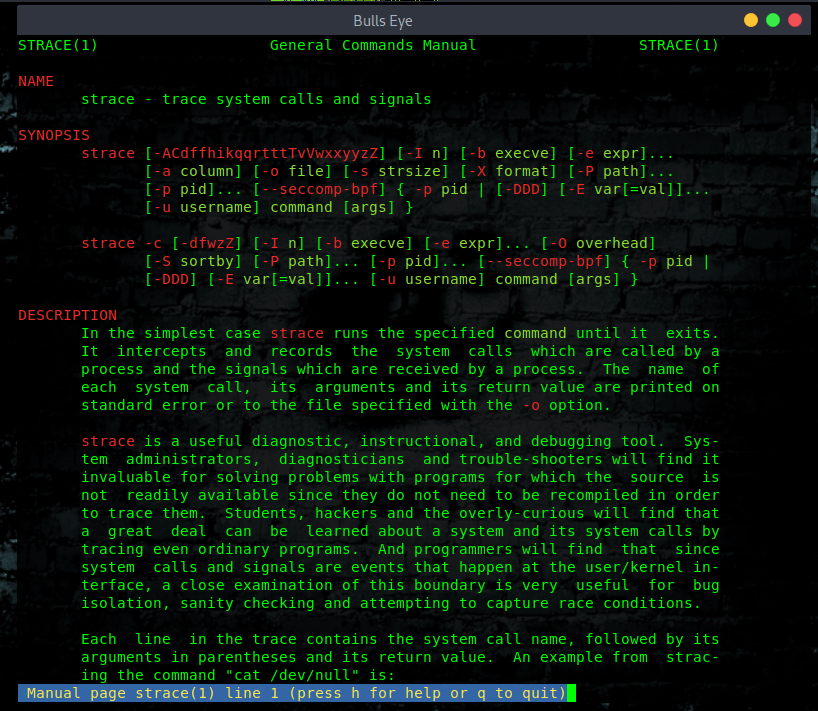
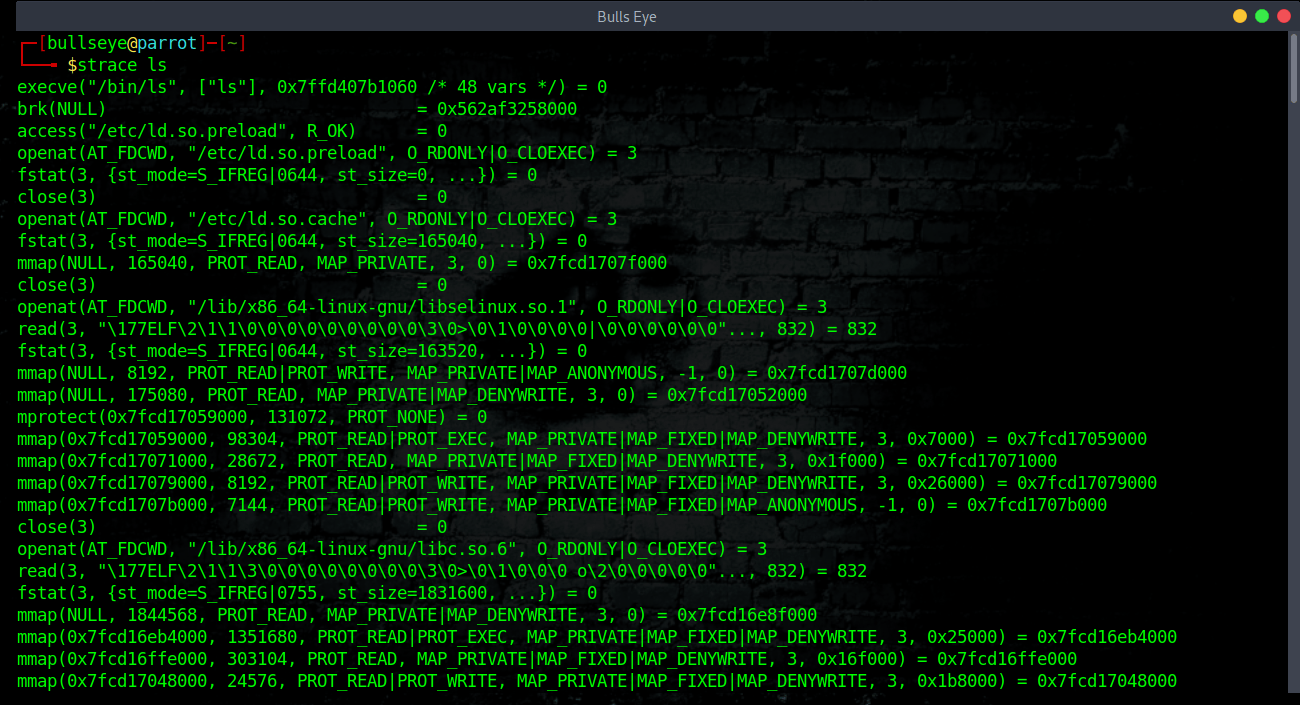
strace
strace is a powerful command-line tool for debugging and troubleshooting. It captures and records all system calls made by a process and the signals received by the process.
If strace is not pre-installed on your Linux system, run the appropriate command below for your distribution, to install it.
Debian/Ubuntu
| |
RHEL/CentOS
| |
Fedora 22+
| |
Arch-based
| |
ManPages strace
| |
| |
| |
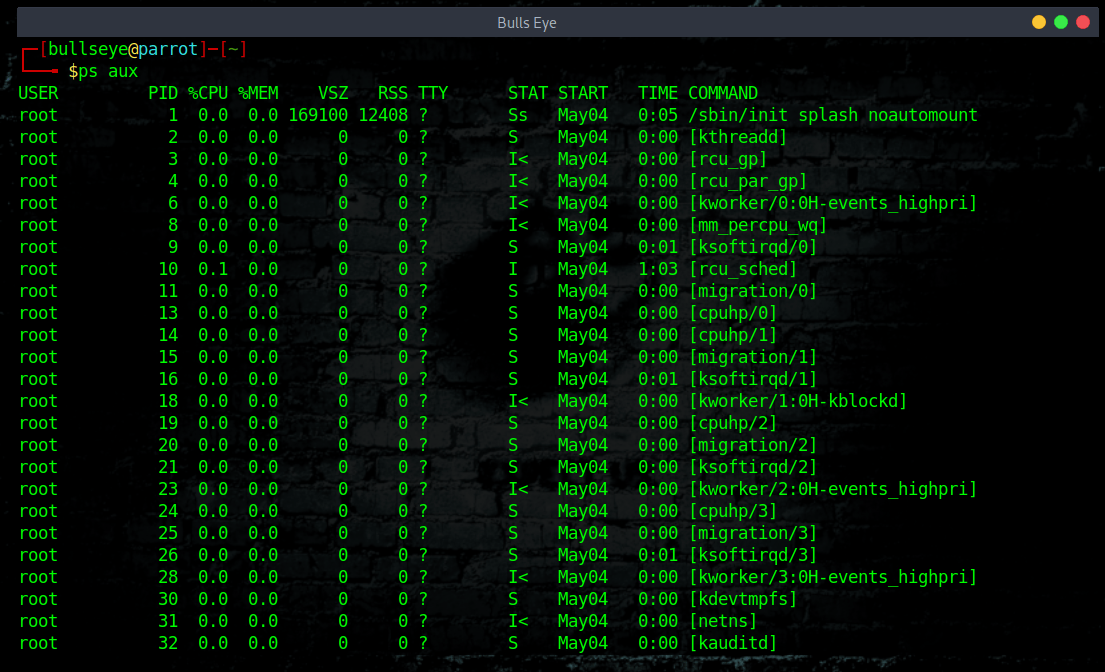
Using ps
The ps (process status) command is one of the most frequently used commands in Linux. Usually it is used to get the more and detailed information about a specific process or all processes. For example it is used to know whether a particular process is running or not, who is running what process in system, which process is using higher memory or CPU, how long a process is running, etc.
Use the “man ps” for more info.
| |
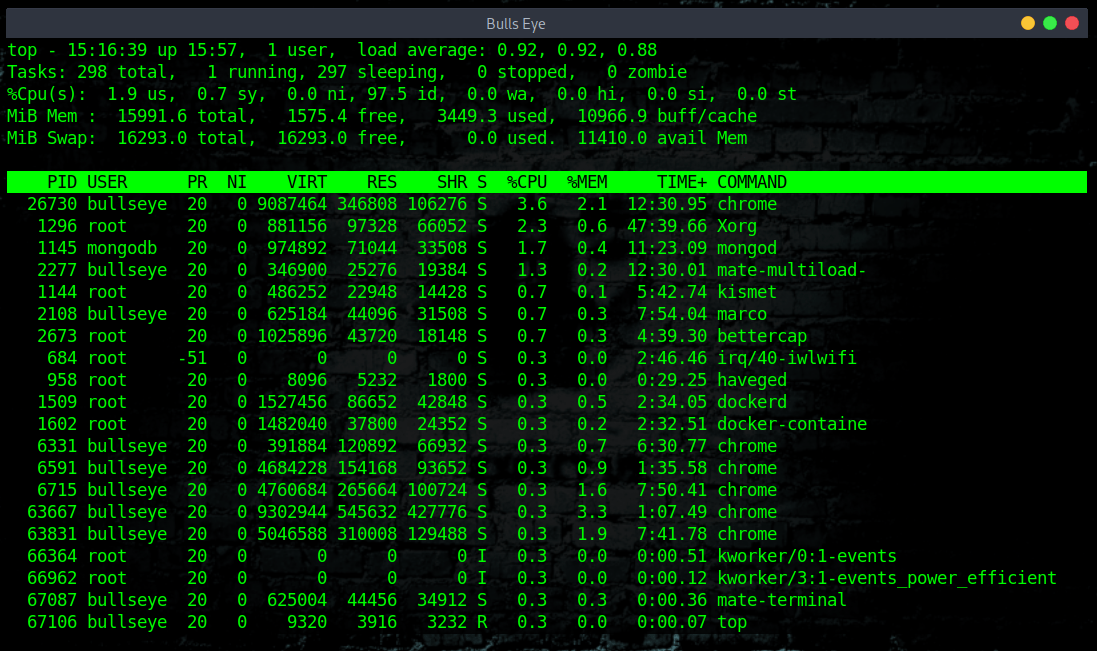
Check the running processes with TOP
The top command is a quick way to see what processes are consuming resources. top comes pre-installed on every Linux distribution. top it is interactive, and you can browse through the list of processes, kill a process, and so on. As you might have already guessed, you simply need to type this in to launch top.
You can use the arrow keys and Page Up/Down keys to browse through the list. If you want to quit, simply press “q”.
| |
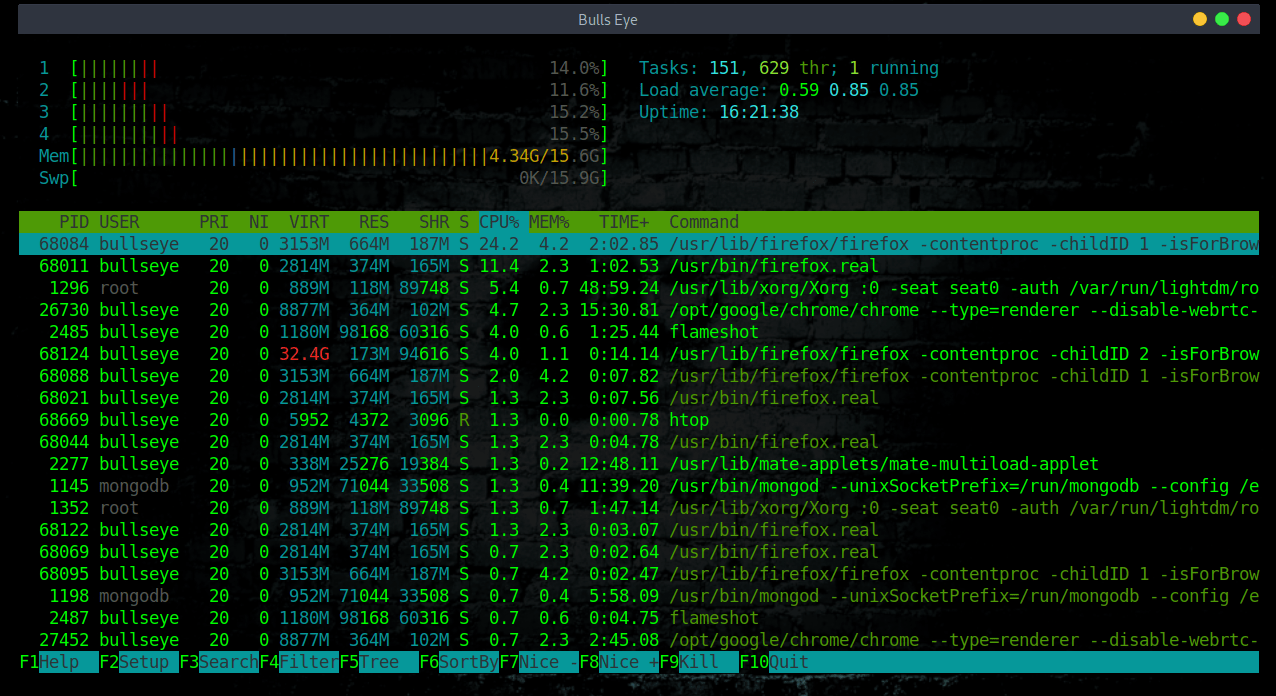
Check the running processes with HTOP
htop is an interactive process viewer and system monitor. It’s one of my favorite linux tools that I use regularly to monitor system resources. If you take top and put it on steroids, then you get htop.
htop has an awesome visual interface that you can also interact with using your keyboard. When you first launch htop, you’ll be greeted with a colorful interface showing a list of all processes running on the system. These are normally ordered by the amount of CPU usage, ordered from highest to lowest. It also shows the status of CPU usage, physical and swap memory.
Kill a Process Without Exiting From htop – Press F9 or k
To kill a process, Select the process that needs to be killed from the list, and press F9 or k, which will display the “Send signal” menu that lists all the available signals that you can send to the command.
Install NTop on Windows
NTop is an Htop-like system-monitor with Vi-emulation for Windows.
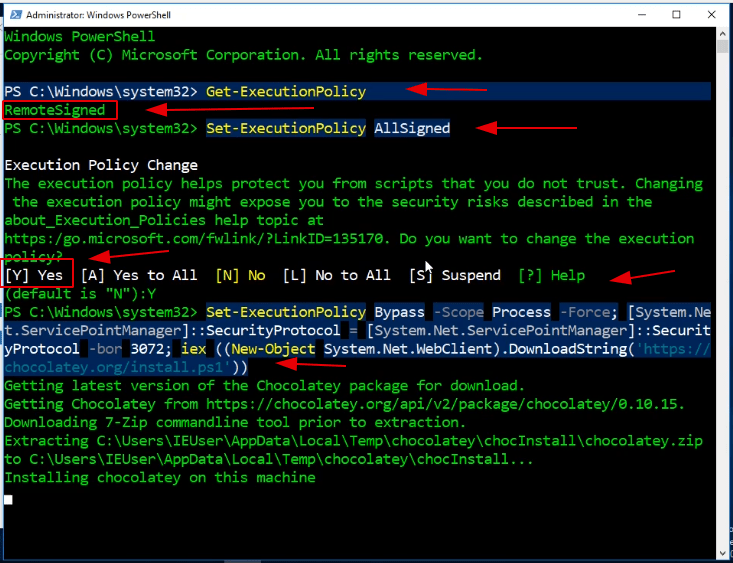
First, you have to open in the search bar PowerShell and run it as administrator. Now we going to install chocolatey
| |
| |
| |
| |
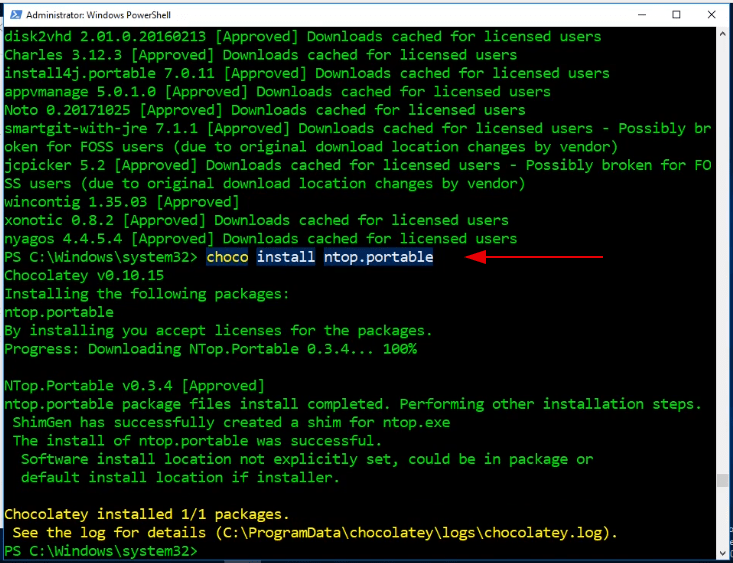
Now that it is installed, you can install NTop
| |
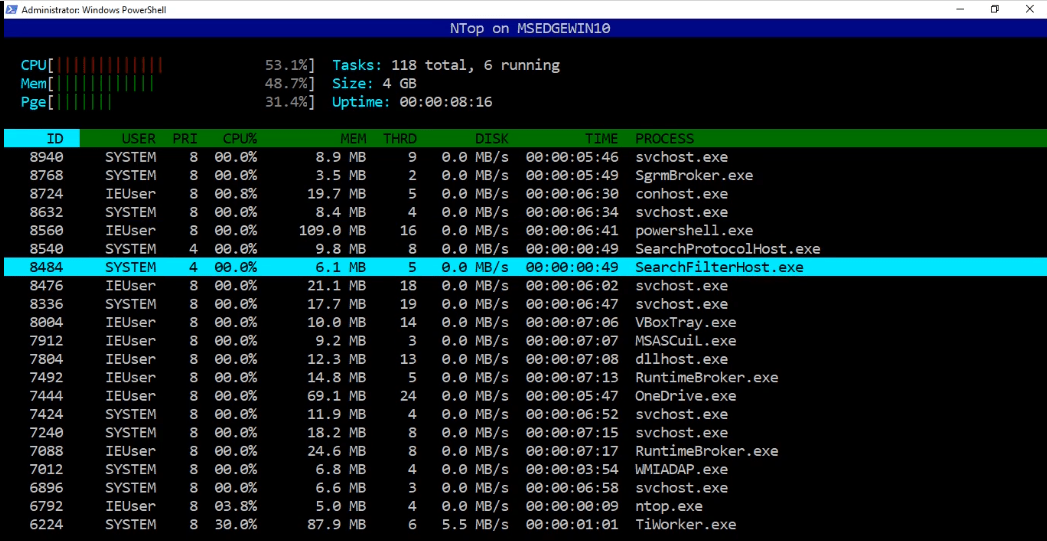
Using NTop for Windows
| |

Video NTop on windows
In this video, I show you how to install NTop on Windows. The last part of the video shows how to use KILL “k” and shows you nstat | more.
Become a member on Odysee.com
Earning on Odysee for watching videos ♥️
Here an invitation link, so that we both benefit.
In this way, you also support my work.
https://odysee.com/$/invite/@hackingpassion:9
Check SSH attempt connections
Check the SSH logs to understand if somebody is trying to get access to the server, or computer.
You can check the access log to the server ( SSH ) in this way.
This command will show you the log from the last 300 lines of all the attempts to get into the ssh server “failed or authorized” with important information such as the username was trying to get access.
Tip: If you need to read backward the log you need to increase the number of lines to 1000 or more, depending on the server use because of this logfile store all access to the server ( FTP, SSH, Webmin, and other… )
If you are using a Debian distribution based
| |
| |
If you are using a Centos/RedHat distribution based
| |
| |
You can use the top command to see what happens on your own PC. The numbers are adjustable.
Open ports
Which ports do you have open? you can see this very well with nmap. A simple nmap scan will do for an initial overview.
| |
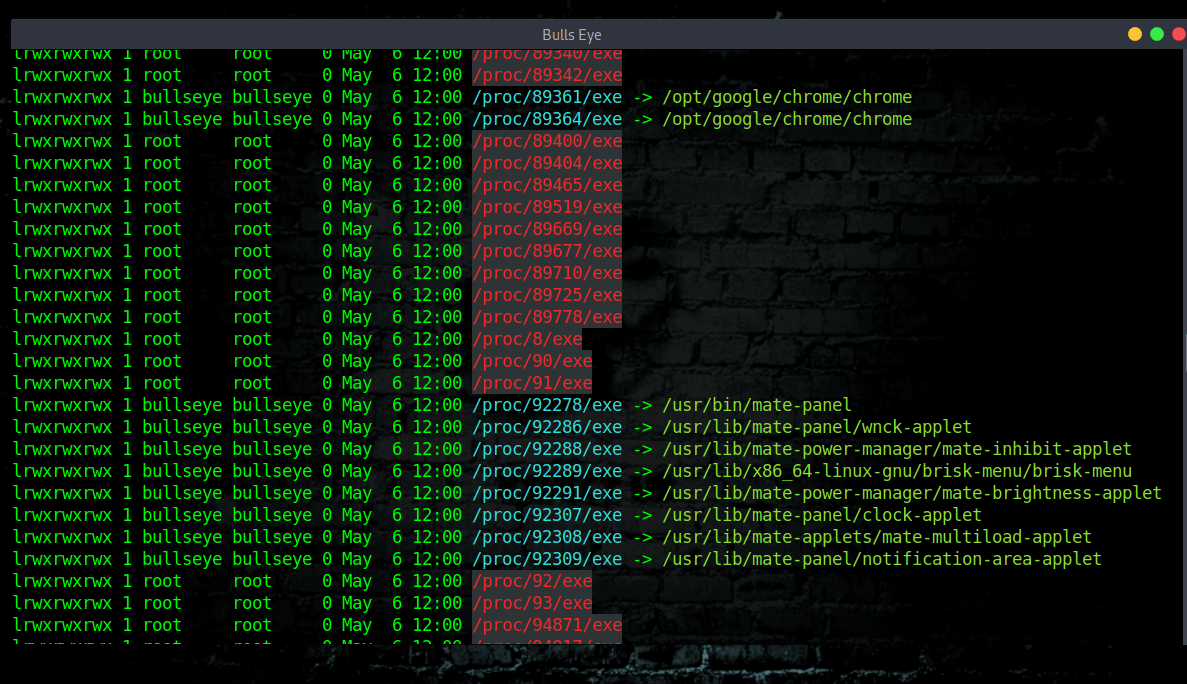
Kernel data structures
The proc file system is a pseudo-file system which provides an interface to kernel data structures. It is commonly mounted at /proc. Read the man page for more info. man proc
| |
or:
| |
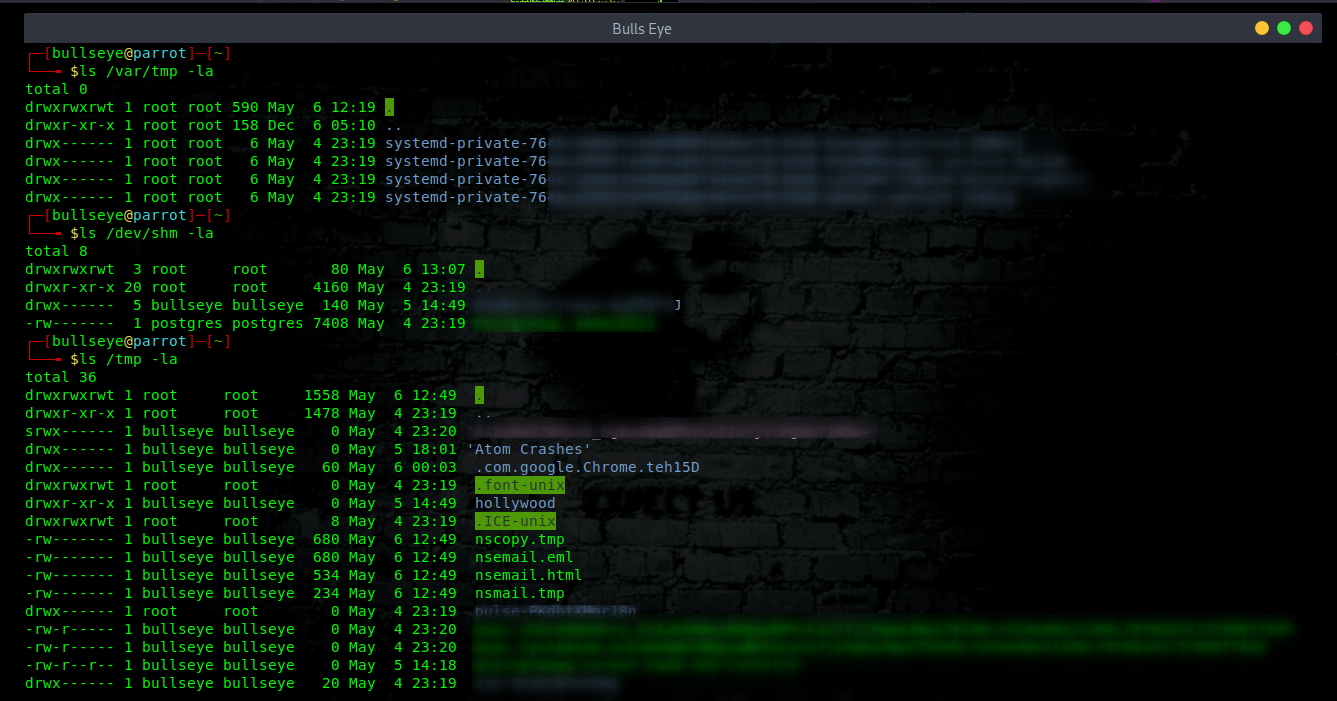
Common attack points
These are all the common unsecured places where the hacker intrudes into your Linux machine
| |
| |
| |
Crontab scheduled jobs
Another way is to check the cronjobs. Maybe a malicious script or application could be seen here.
“The crontab is a list of commands that runs on a regular schedule. Crontab stands for “cron table ” because it uses the job scheduler cron to execute tasks.”
A cronjob can be running from /etc/crontab file. To view it run the following less command:
| |
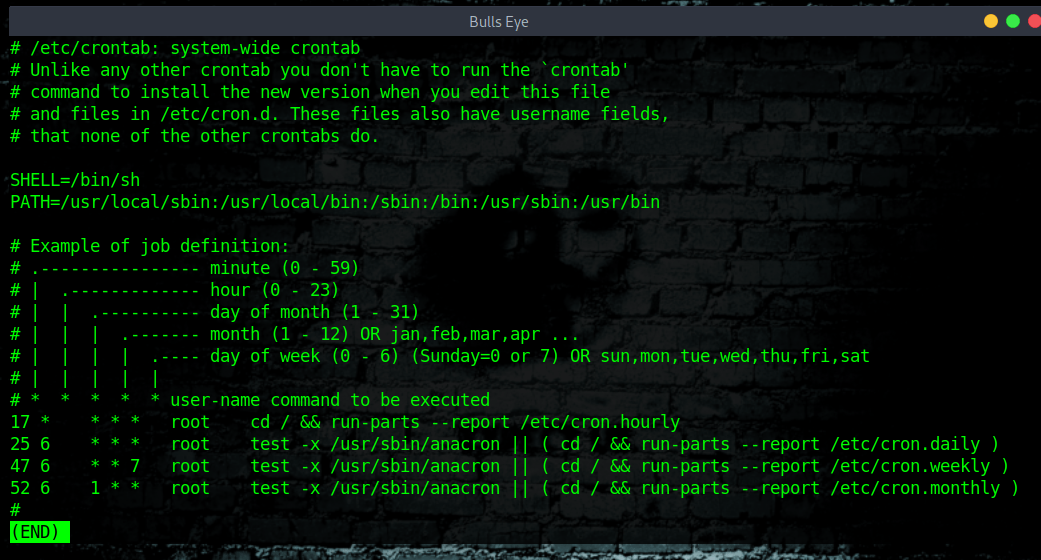
How to view /etc/crontab on Linux
| |
| |

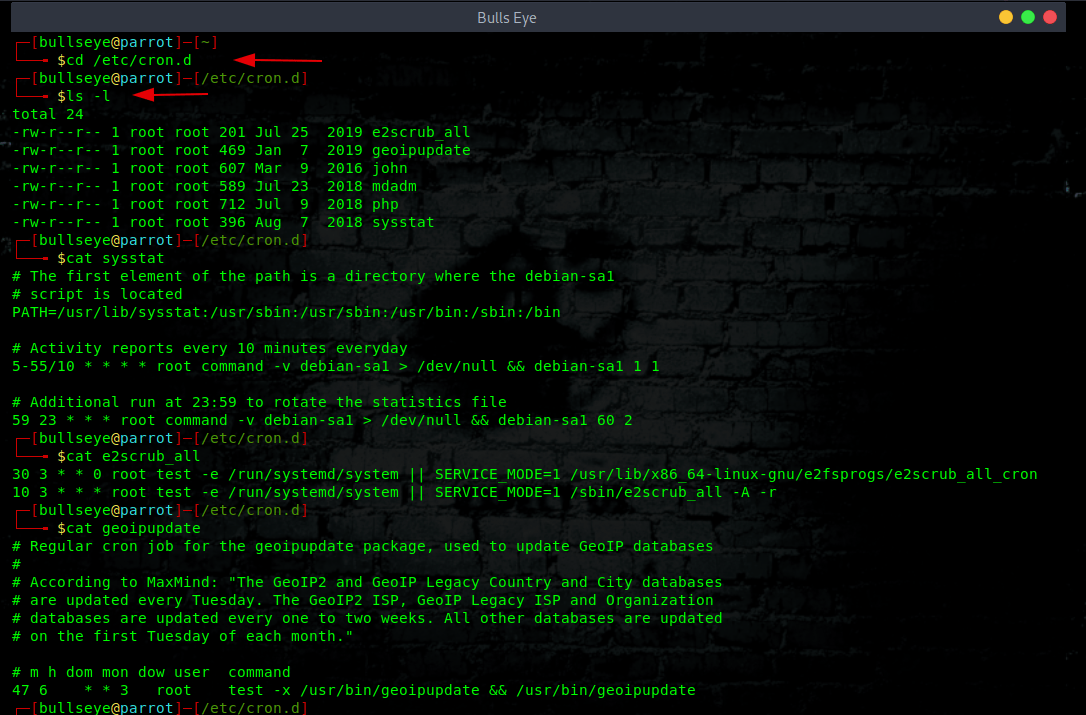
View Software Specific Cronjobs
| |
| |
| |
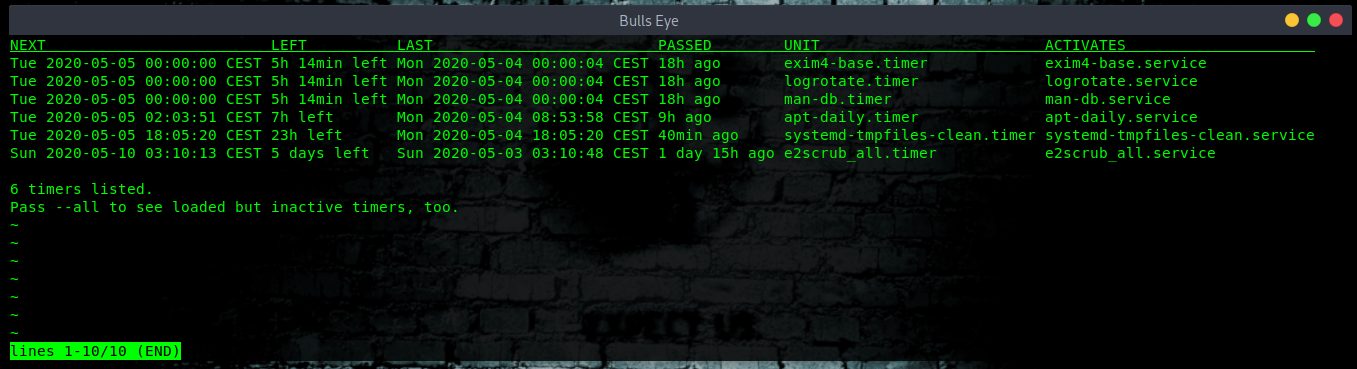
Listing users cron jobs when using systemd timers
Systemd comes with cron system called systemd.timer. This is another option that you can use on systemd based Linux distro. Use the systemctl command as follows to list cron jobs in Linux
| |
Conclusion
In this article, I showed you some useful commands and tools where you can determine whether “your Linux computer or server is hacked” You can also use tools such as Wireshark, Snort, and many other tools. But more about that in another article.
WANT TO SUPPORT THE WEBSITE
Dear people, I do a lot of things on the Internet and I do it all for free. If I don’t get enough to support myself, it becomes very difficult to maintain my web presence, which takes a lot of time, and the server costs also have to be paid. Your support is greatly appreciated.
Thanks guys ..!
https://paypal.me/hackingpassion
Use the link above to donate via PayPal.
IMPORTANT THINGS TO REMEMBER
✓ This Video and Article is made for educational purposes and pentest only.
* You will not misuse the information to gain unauthorized access.
✓ This information shall only be used to expand knowledge and not for causing malicious or damaging attacks…!
Read also the Disclaimer
All the techniques provided in the tutorials on HackingPassion.com, are meant for educational purposes only.
If you are using any of those techniques for illegal purposes, HackingPassion.com can’t be held responsible for possible lawful consequences.
My goal is to educate people and increase awareness by exposing methods used by real black-hat hackers and show how to secure systems from these hackers.
Stay updated
Get the latest posts in your inbox every week. Ethical hacking, security news, tutorials, and everything that catches my attention. If that sounds useful, drop your email below.